Add Items
3.3 Add Item Overview
In the "Add Item" section, users can effortlessly expand their restaurant's menu. This process includes providing essential details such as item name, category selection, pricing, description, page slug, availability settings, and tax exemption preferences.
1. Add Item:
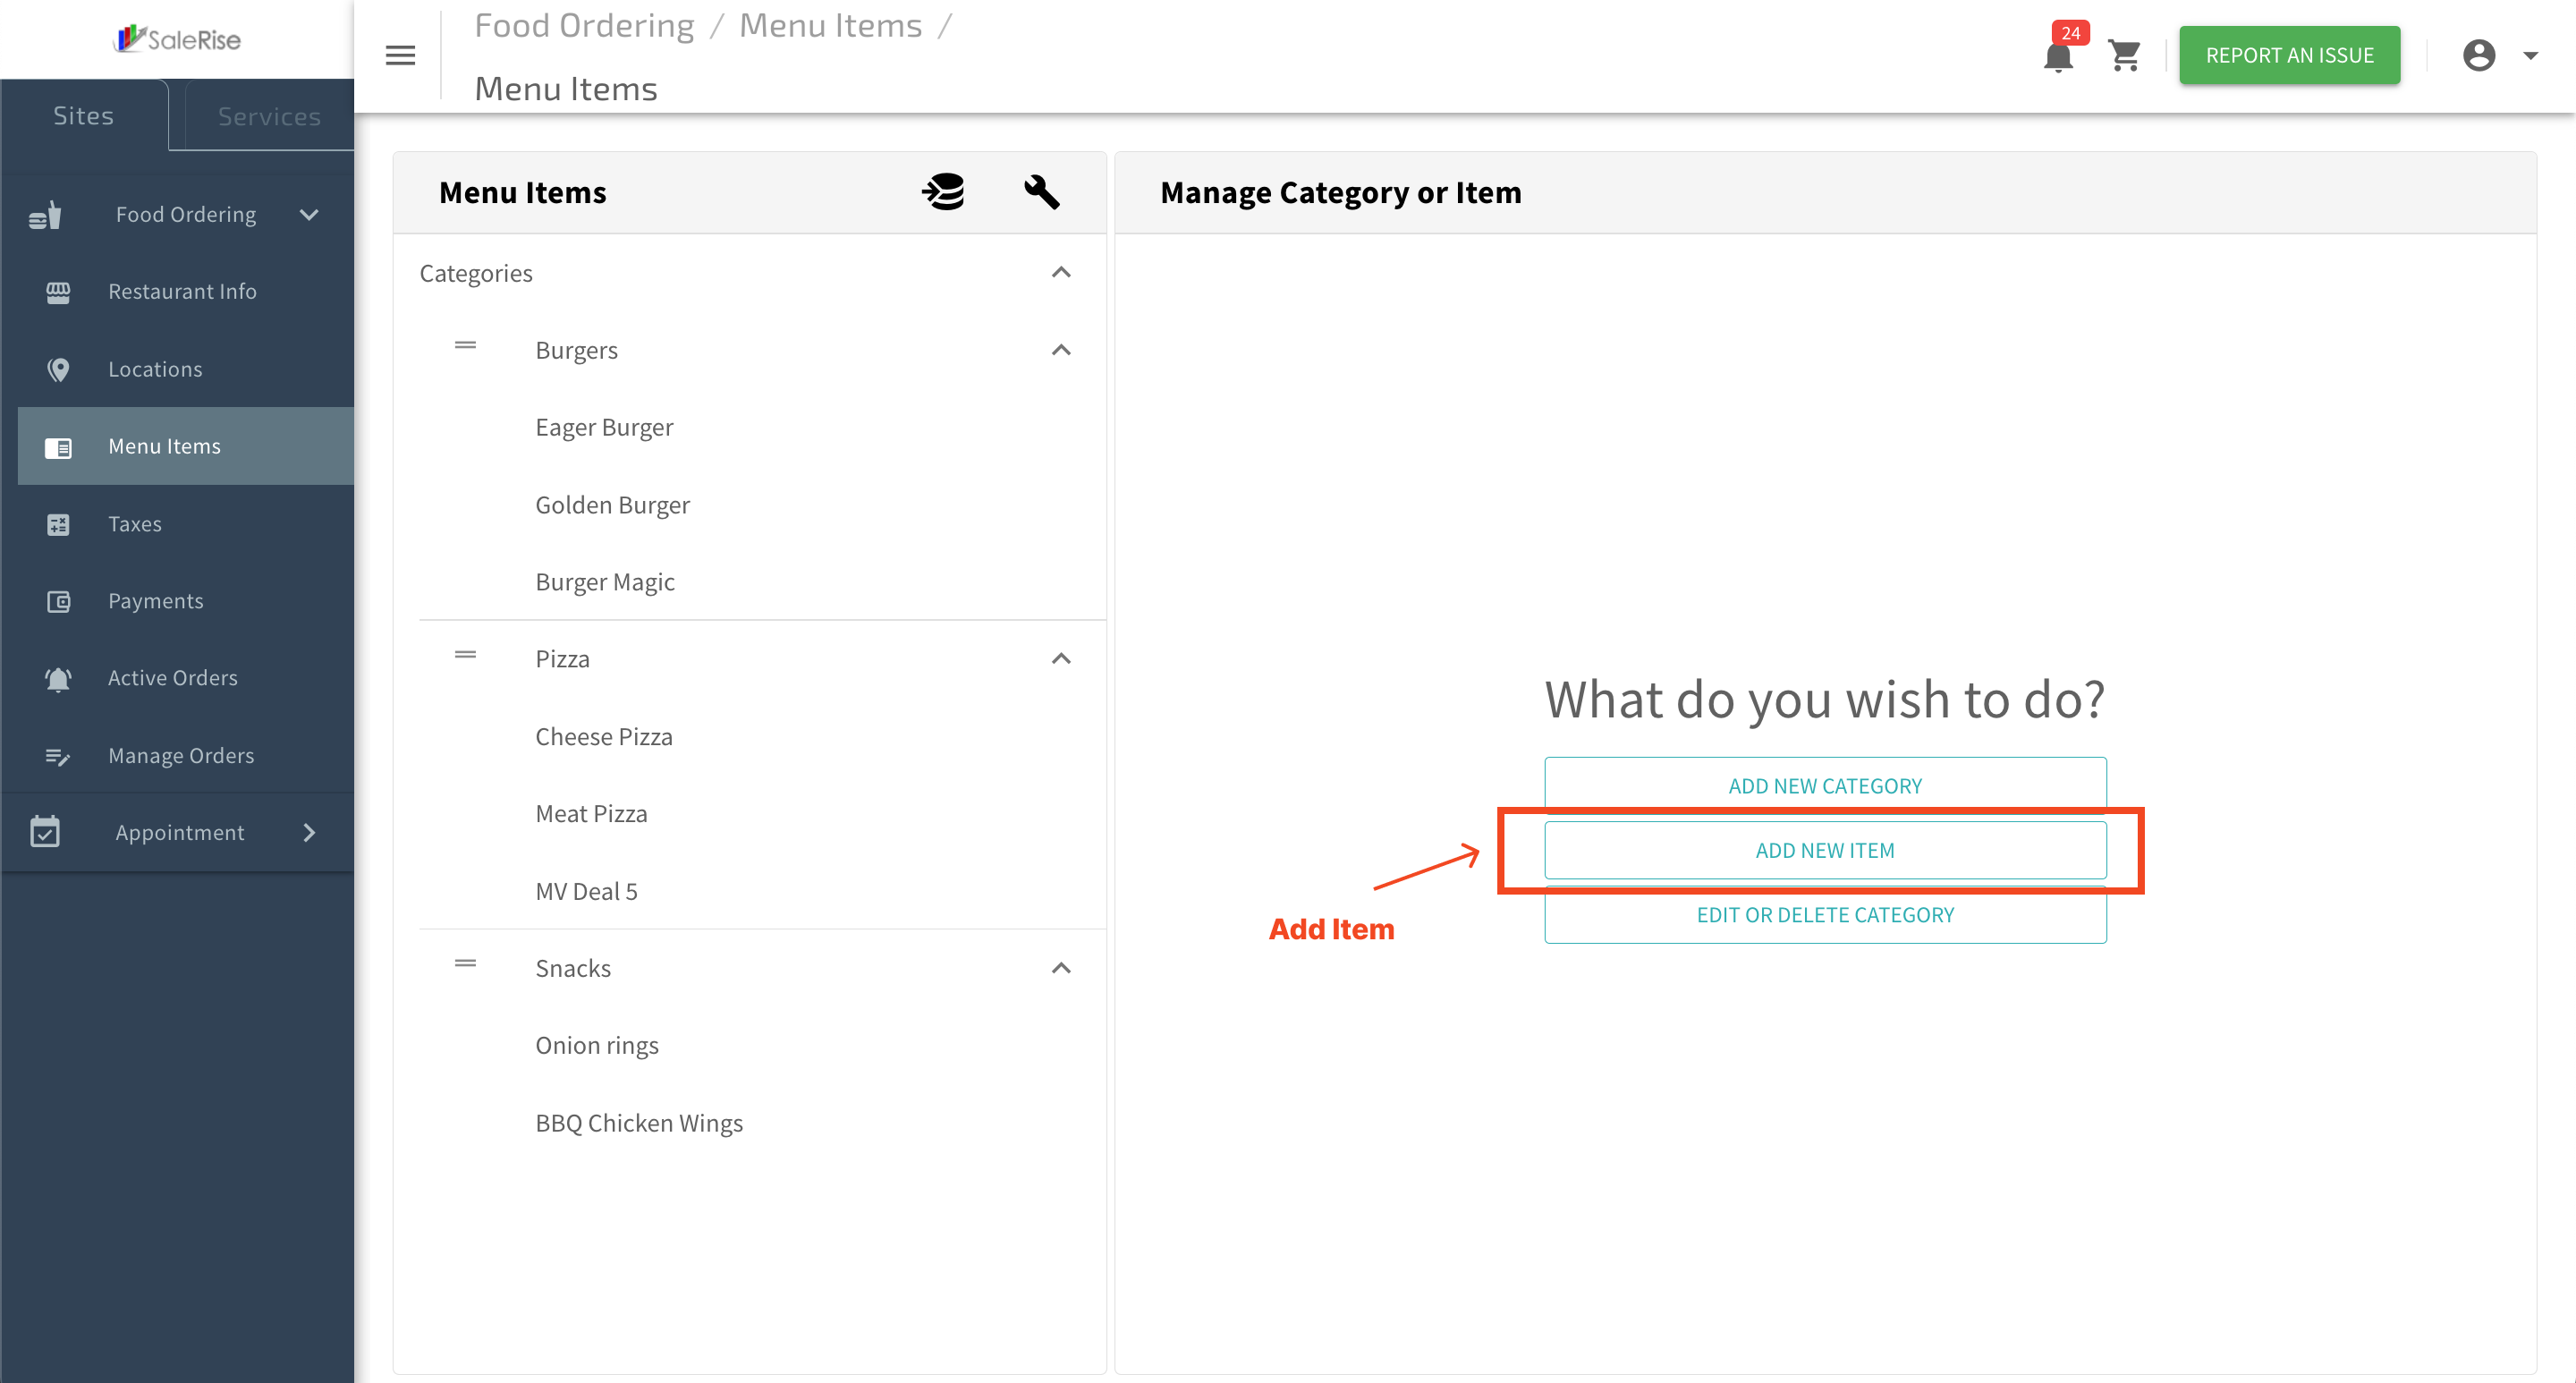
2. Basic Information:
- Enter the fundamental details for the new item.
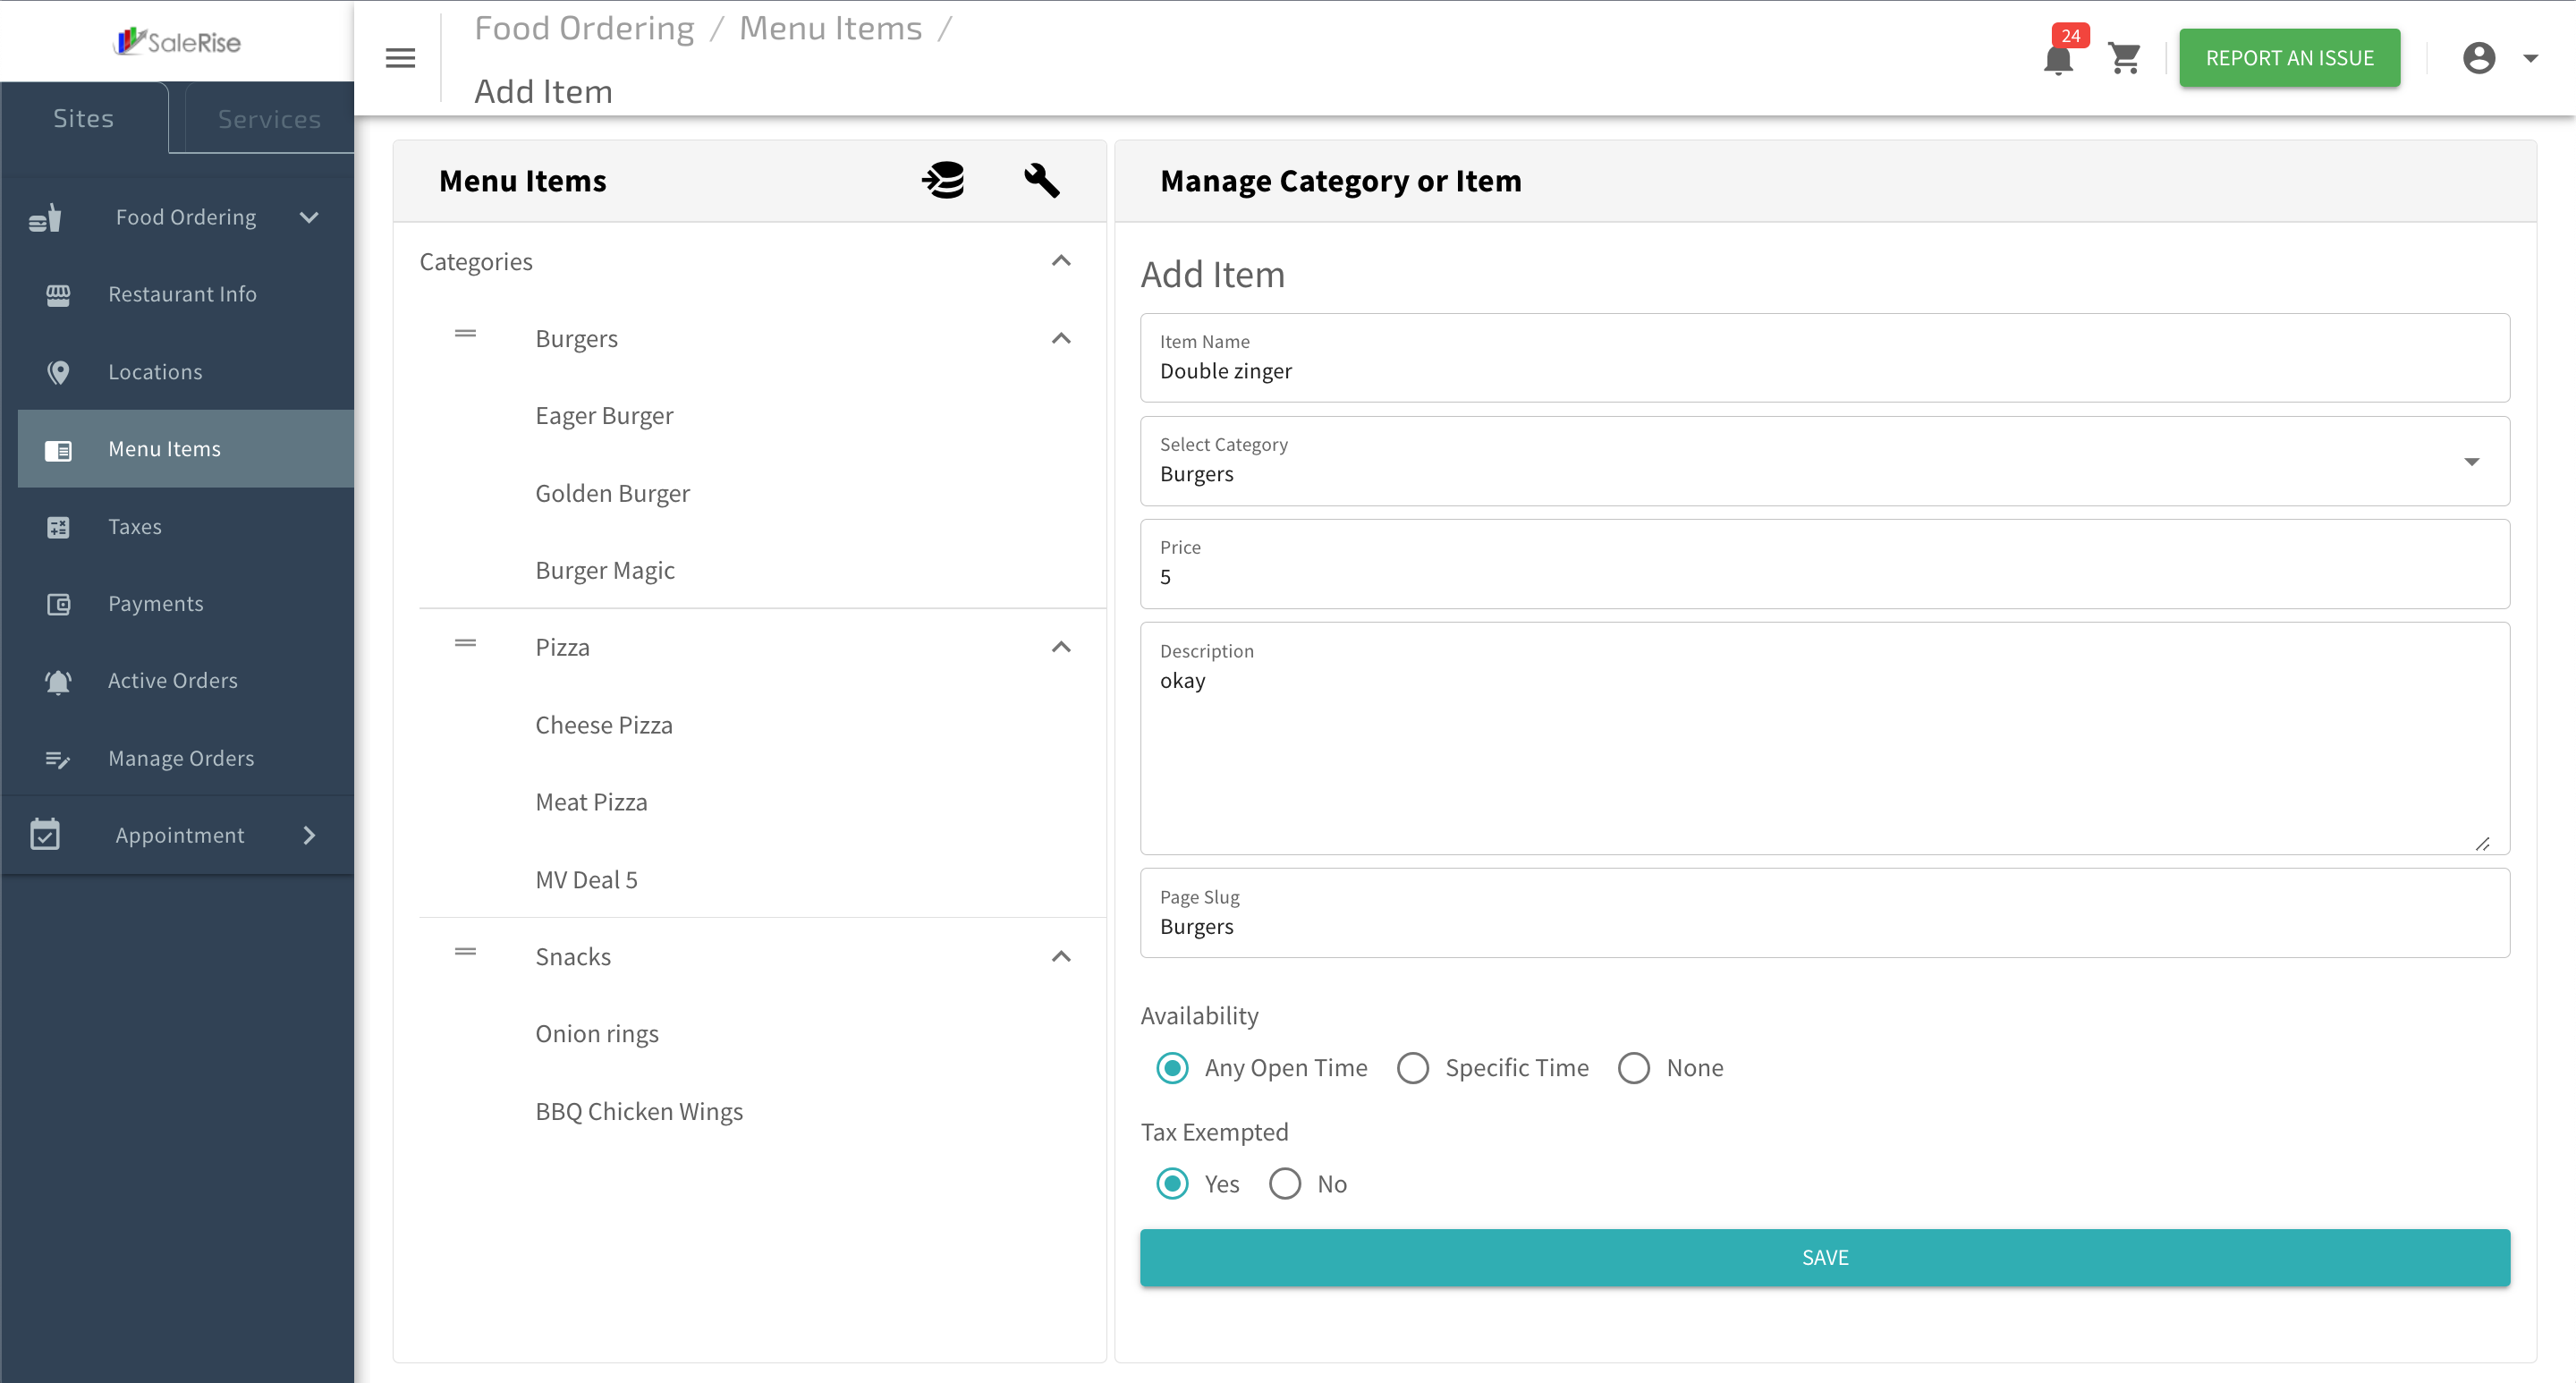
- Item Name: Provide a descriptive name for the item.
- Select Category: Choose the appropriate category from the available options.
3. Pricing and Description:
- Set the pricing and provide a detailed description of the item.
- Price: Specify the cost of the item.
- Description: Offer an engaging description to entice customers.
4. SEO-Friendly Details:
- Enhance online visibility with SEO-friendly details.
- Page Slug: Set a user-friendly URL slug for the item.
5. Availability Settings:
- Choose the availability settings for the item.
- Availability Options: Select from "Any Open Time," "Special Time," or "None."
6. Tax Exemption:
- Indicate whether the item is tax-exempt.
- Tax Exempted: Choose between "Yes" or "No" for tax exemption.
7. Save and Confirm:
- Click "Save" to confirm the addition of the new item.
-----------------------------------------------------------------------------------------------------------------------------
3.3.1 Items - Enhance Details
After successfully adding the basic details of a new item, users can now enhance their menu item by including an image, creating option groups, adding individual options, and specifying sizes.
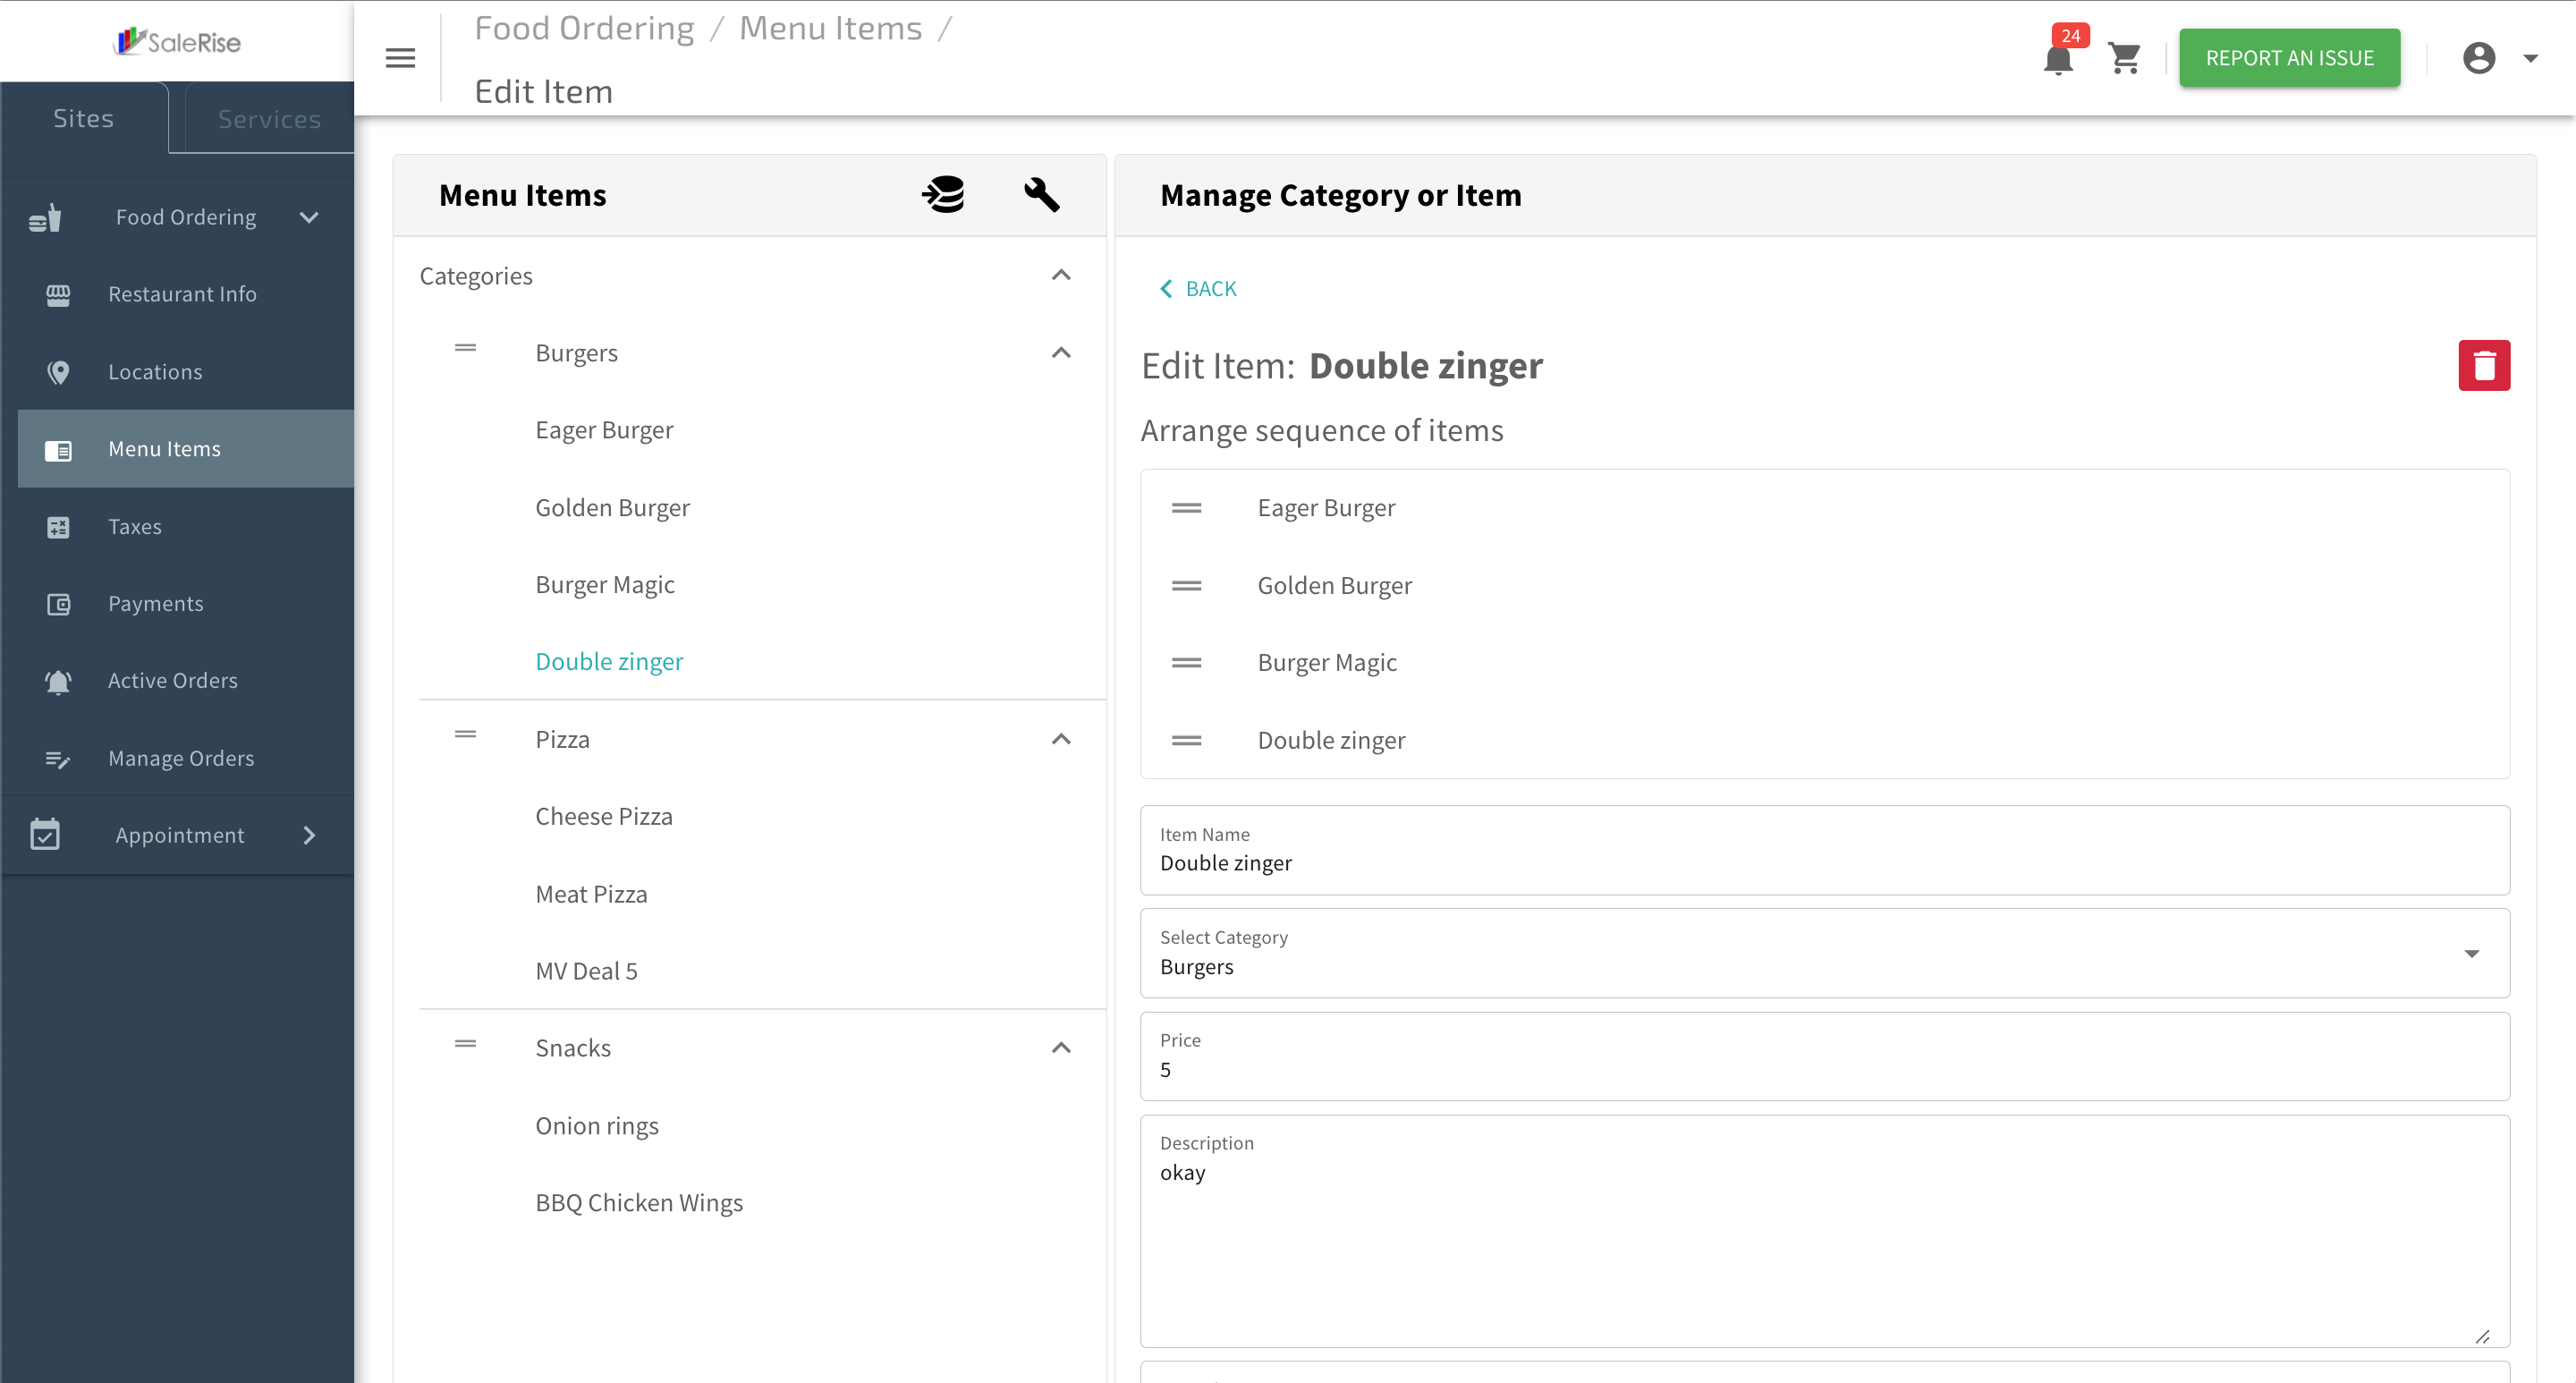
1. View Added Item:
- After saving the basic details, the user can view the added item in the menu.
2. Add Image:
- Upload a visually appealing image to showcase the item.
- Click on "Add Image" and choose the image file.
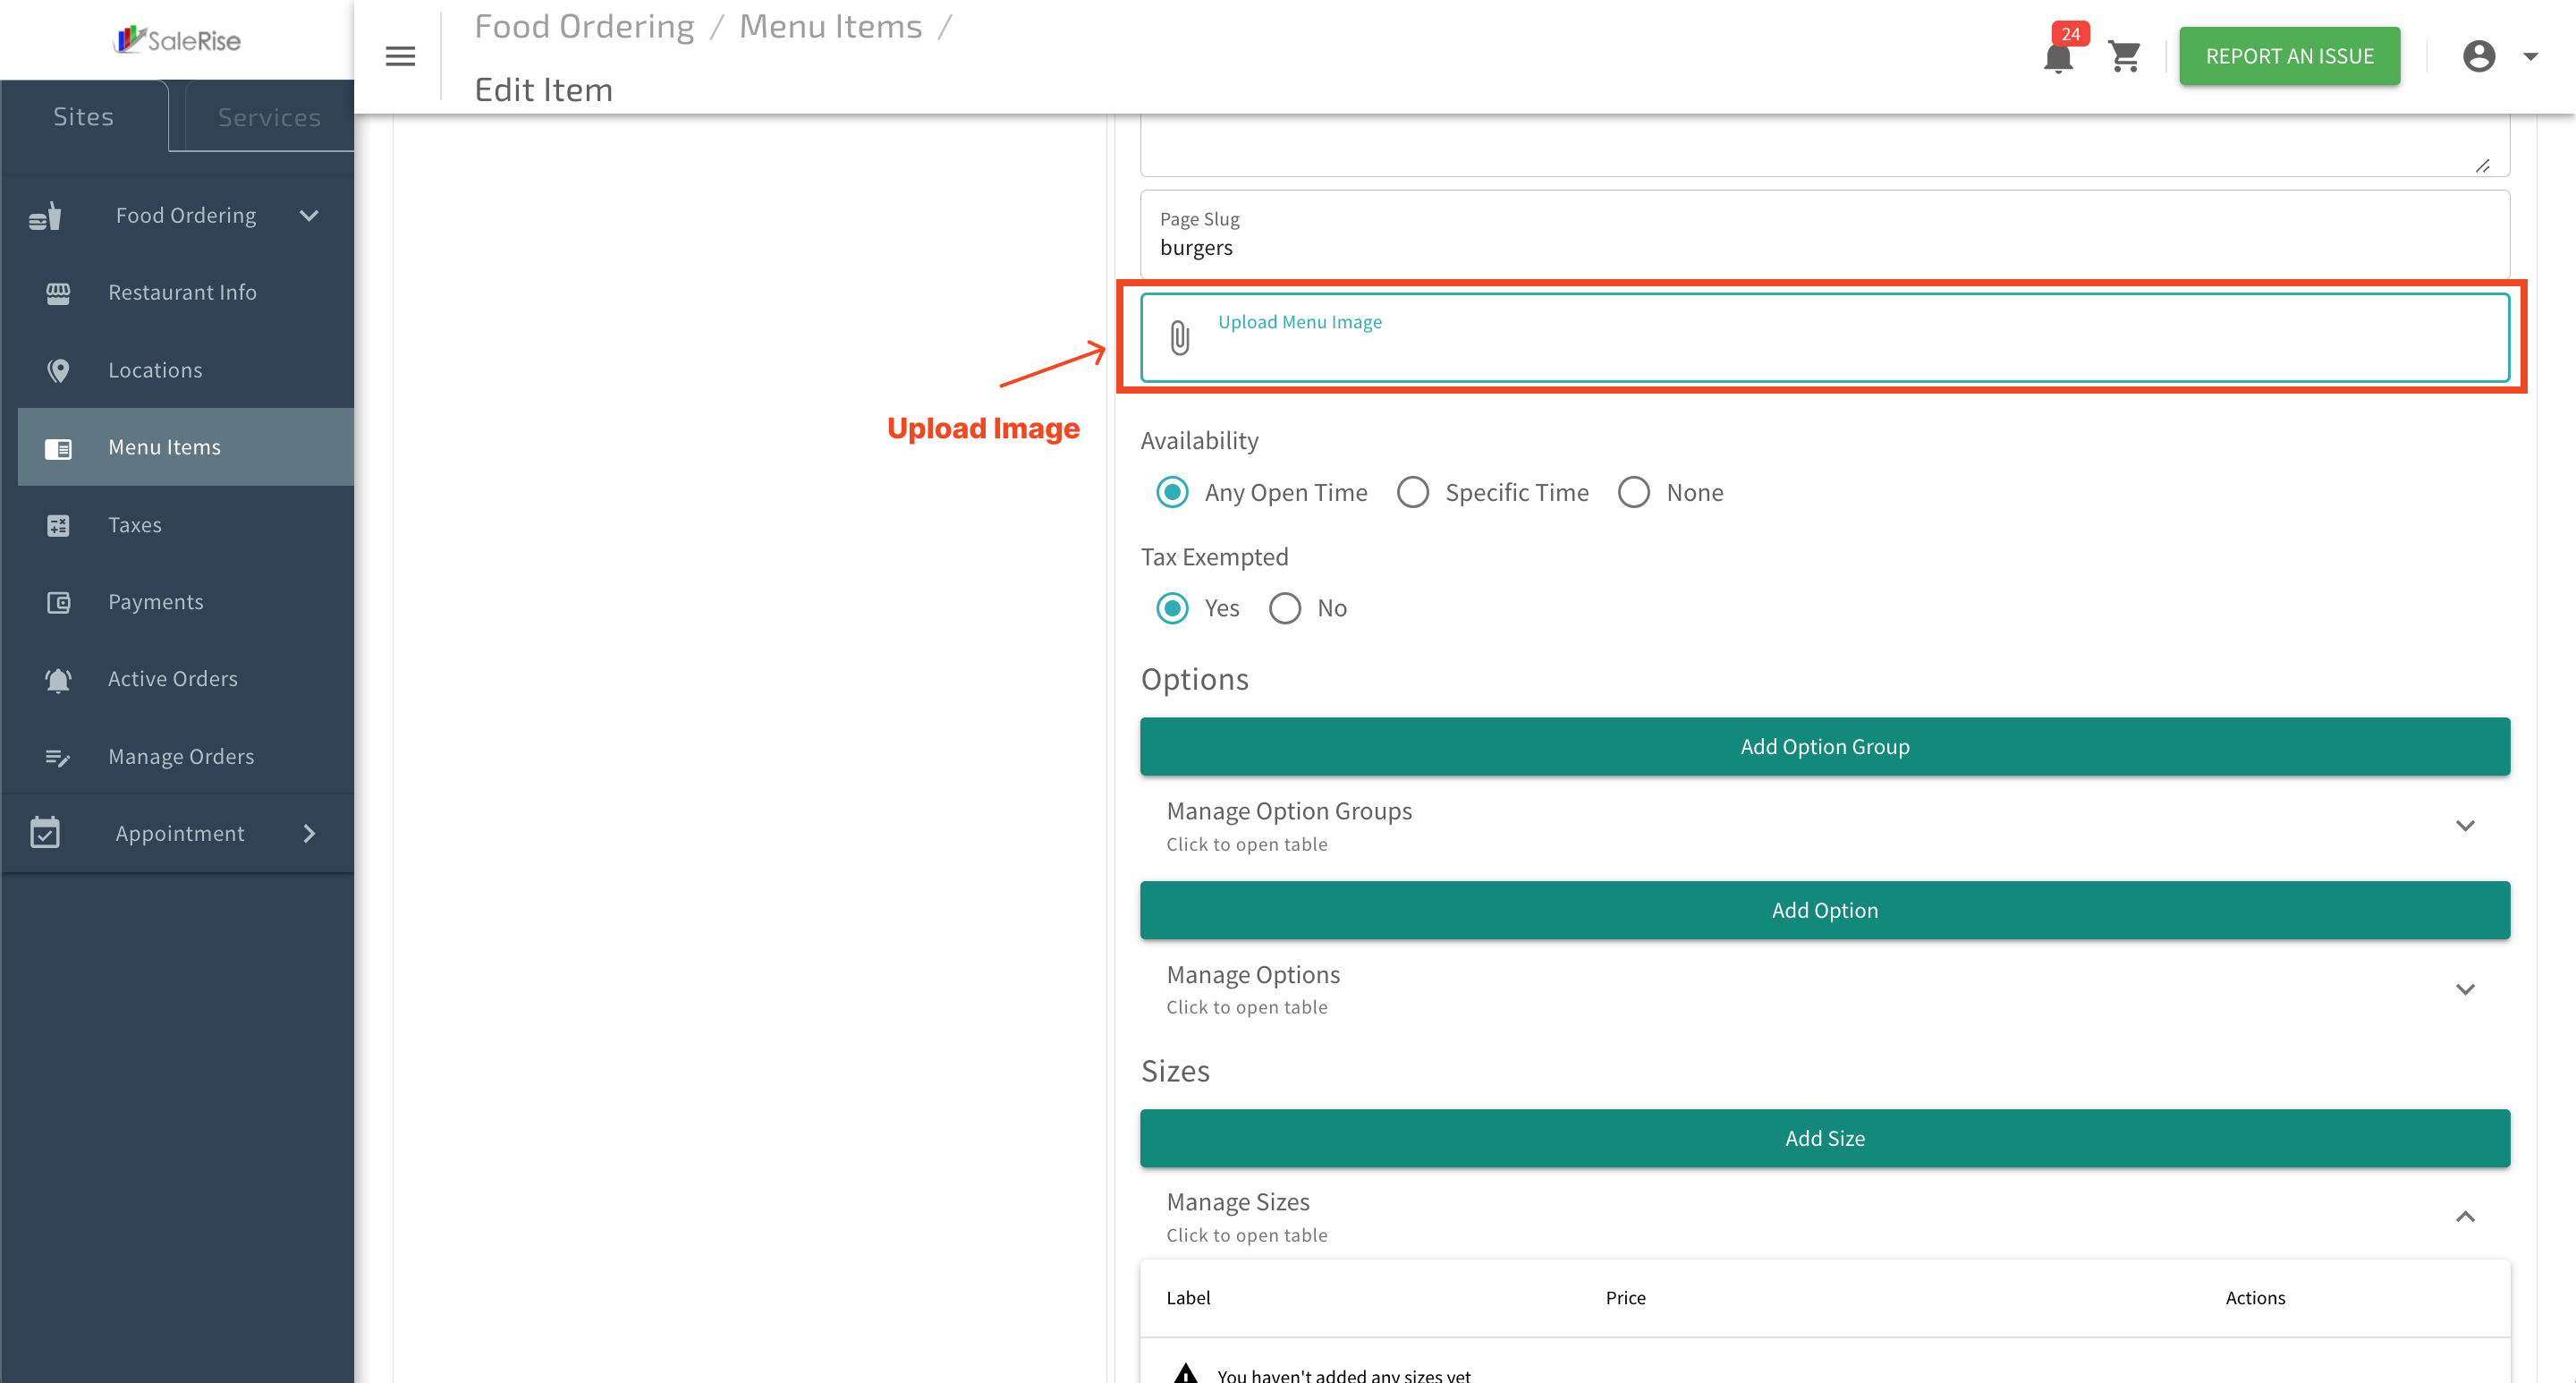
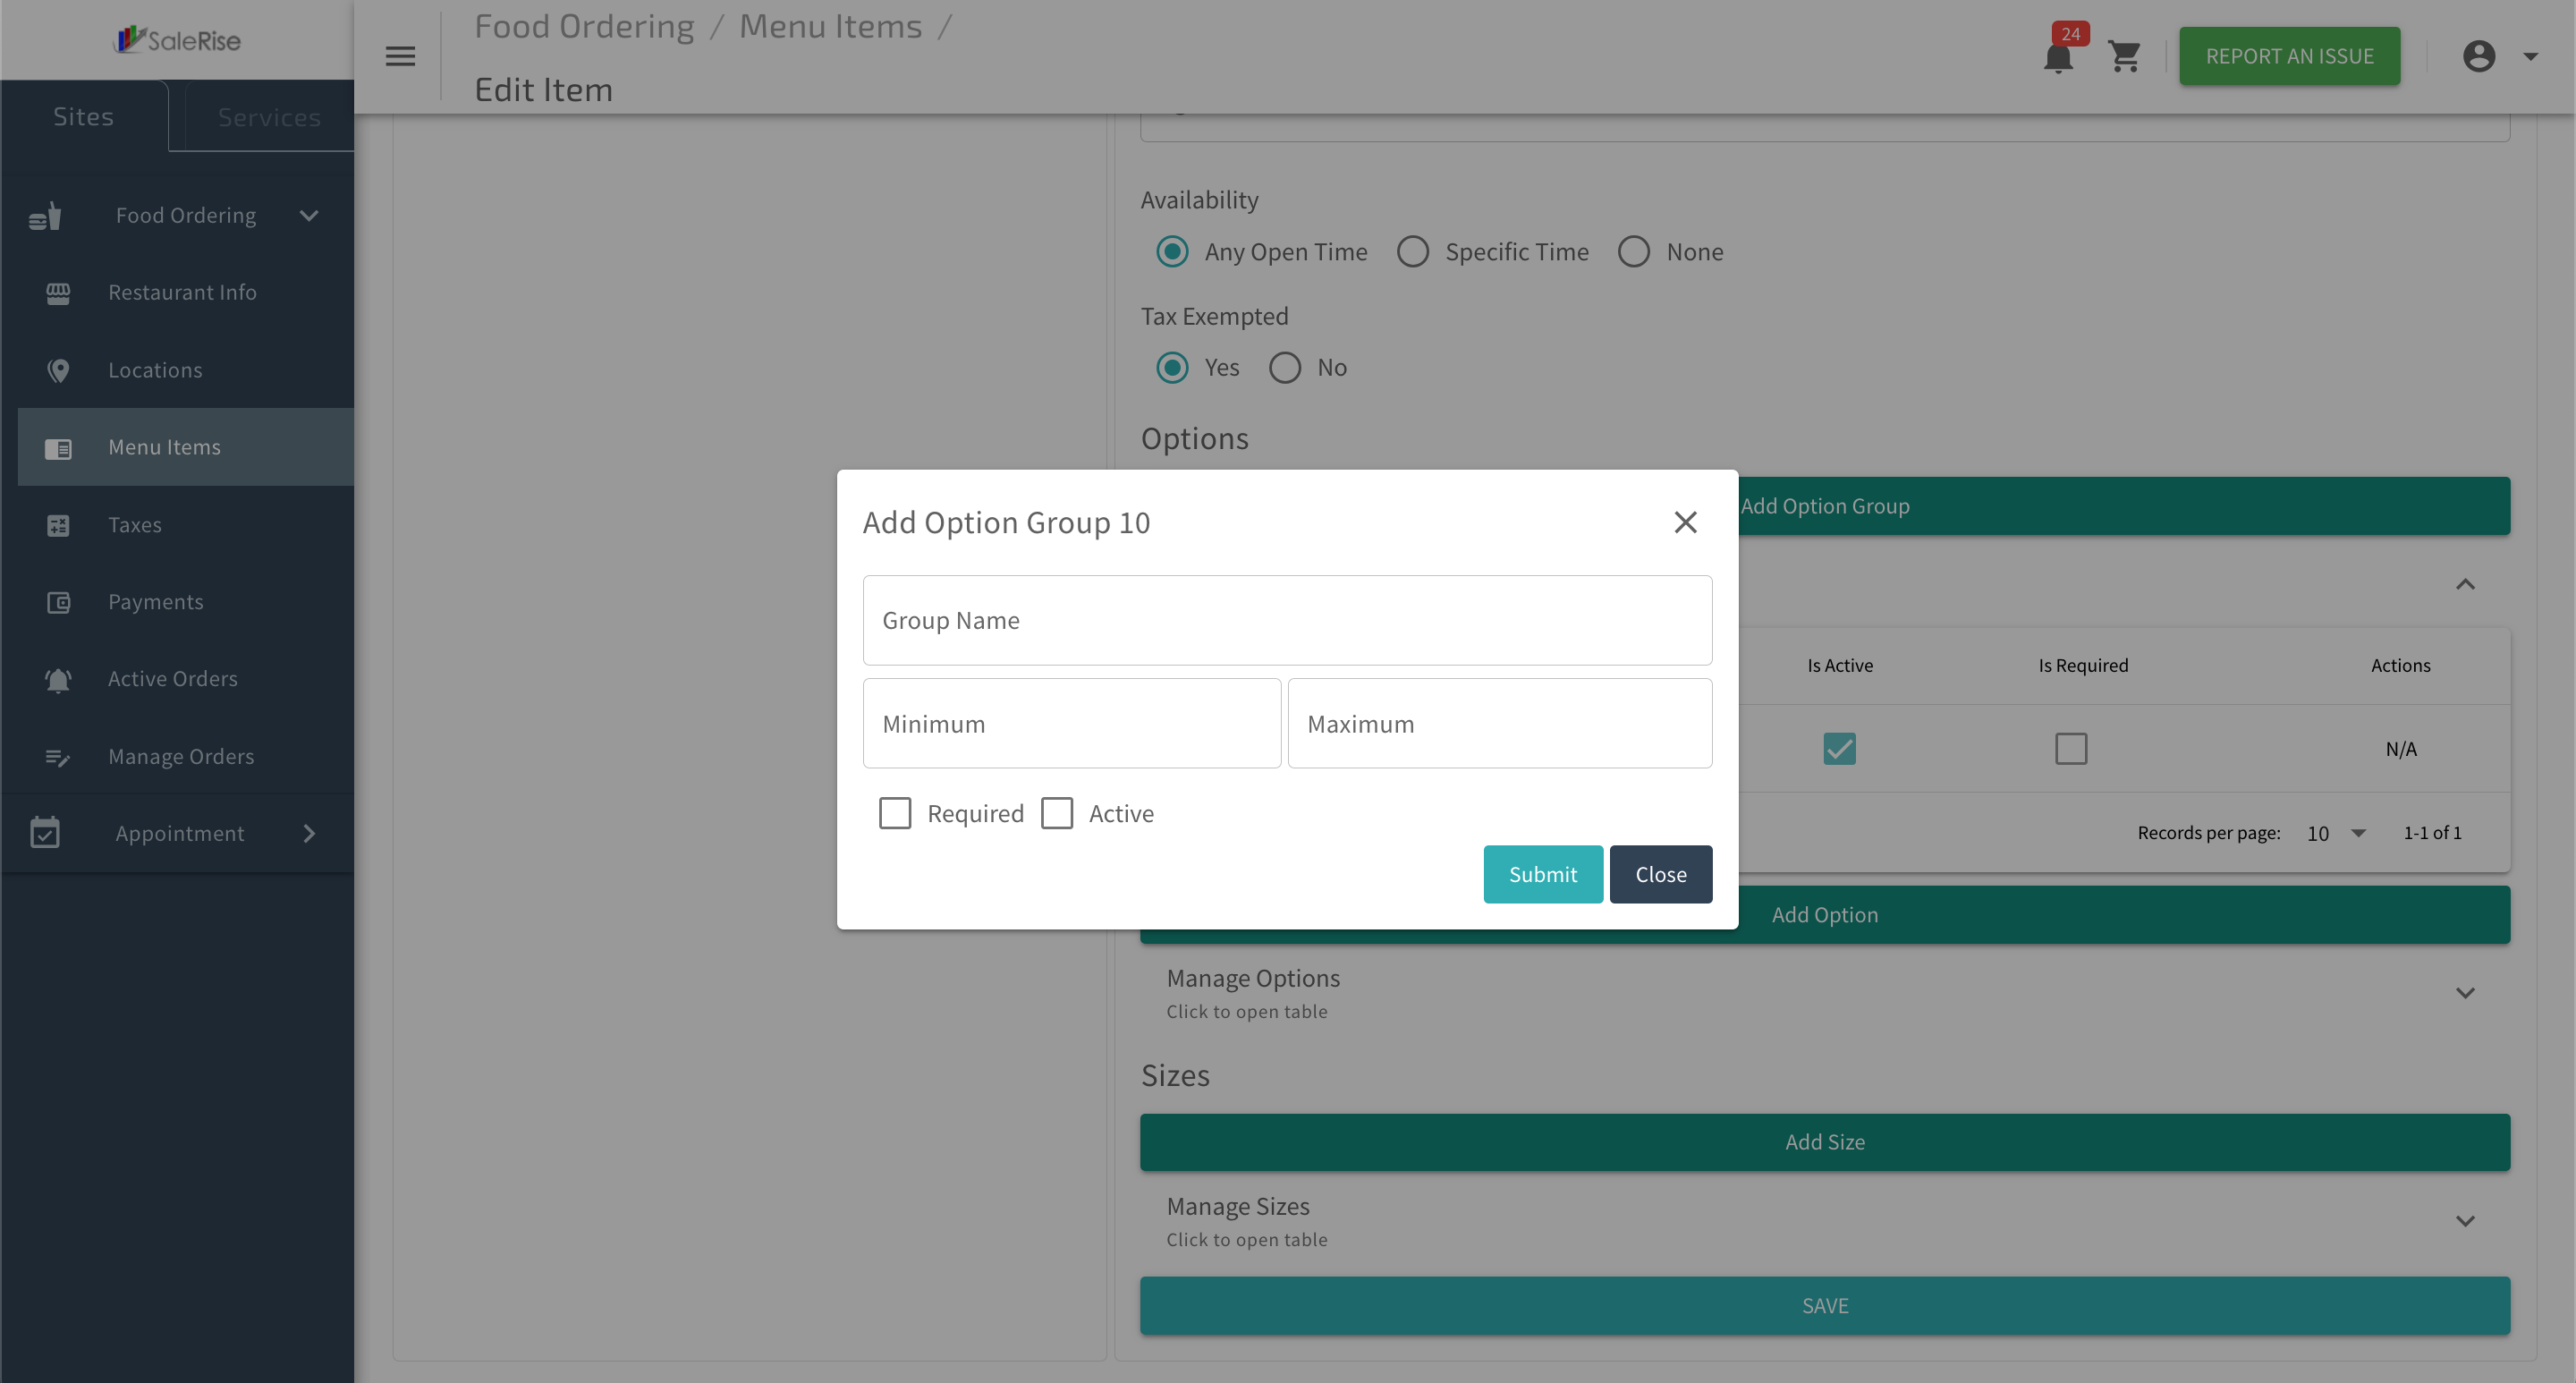
3. Option Groups:
Enhance customization by creating option groups.
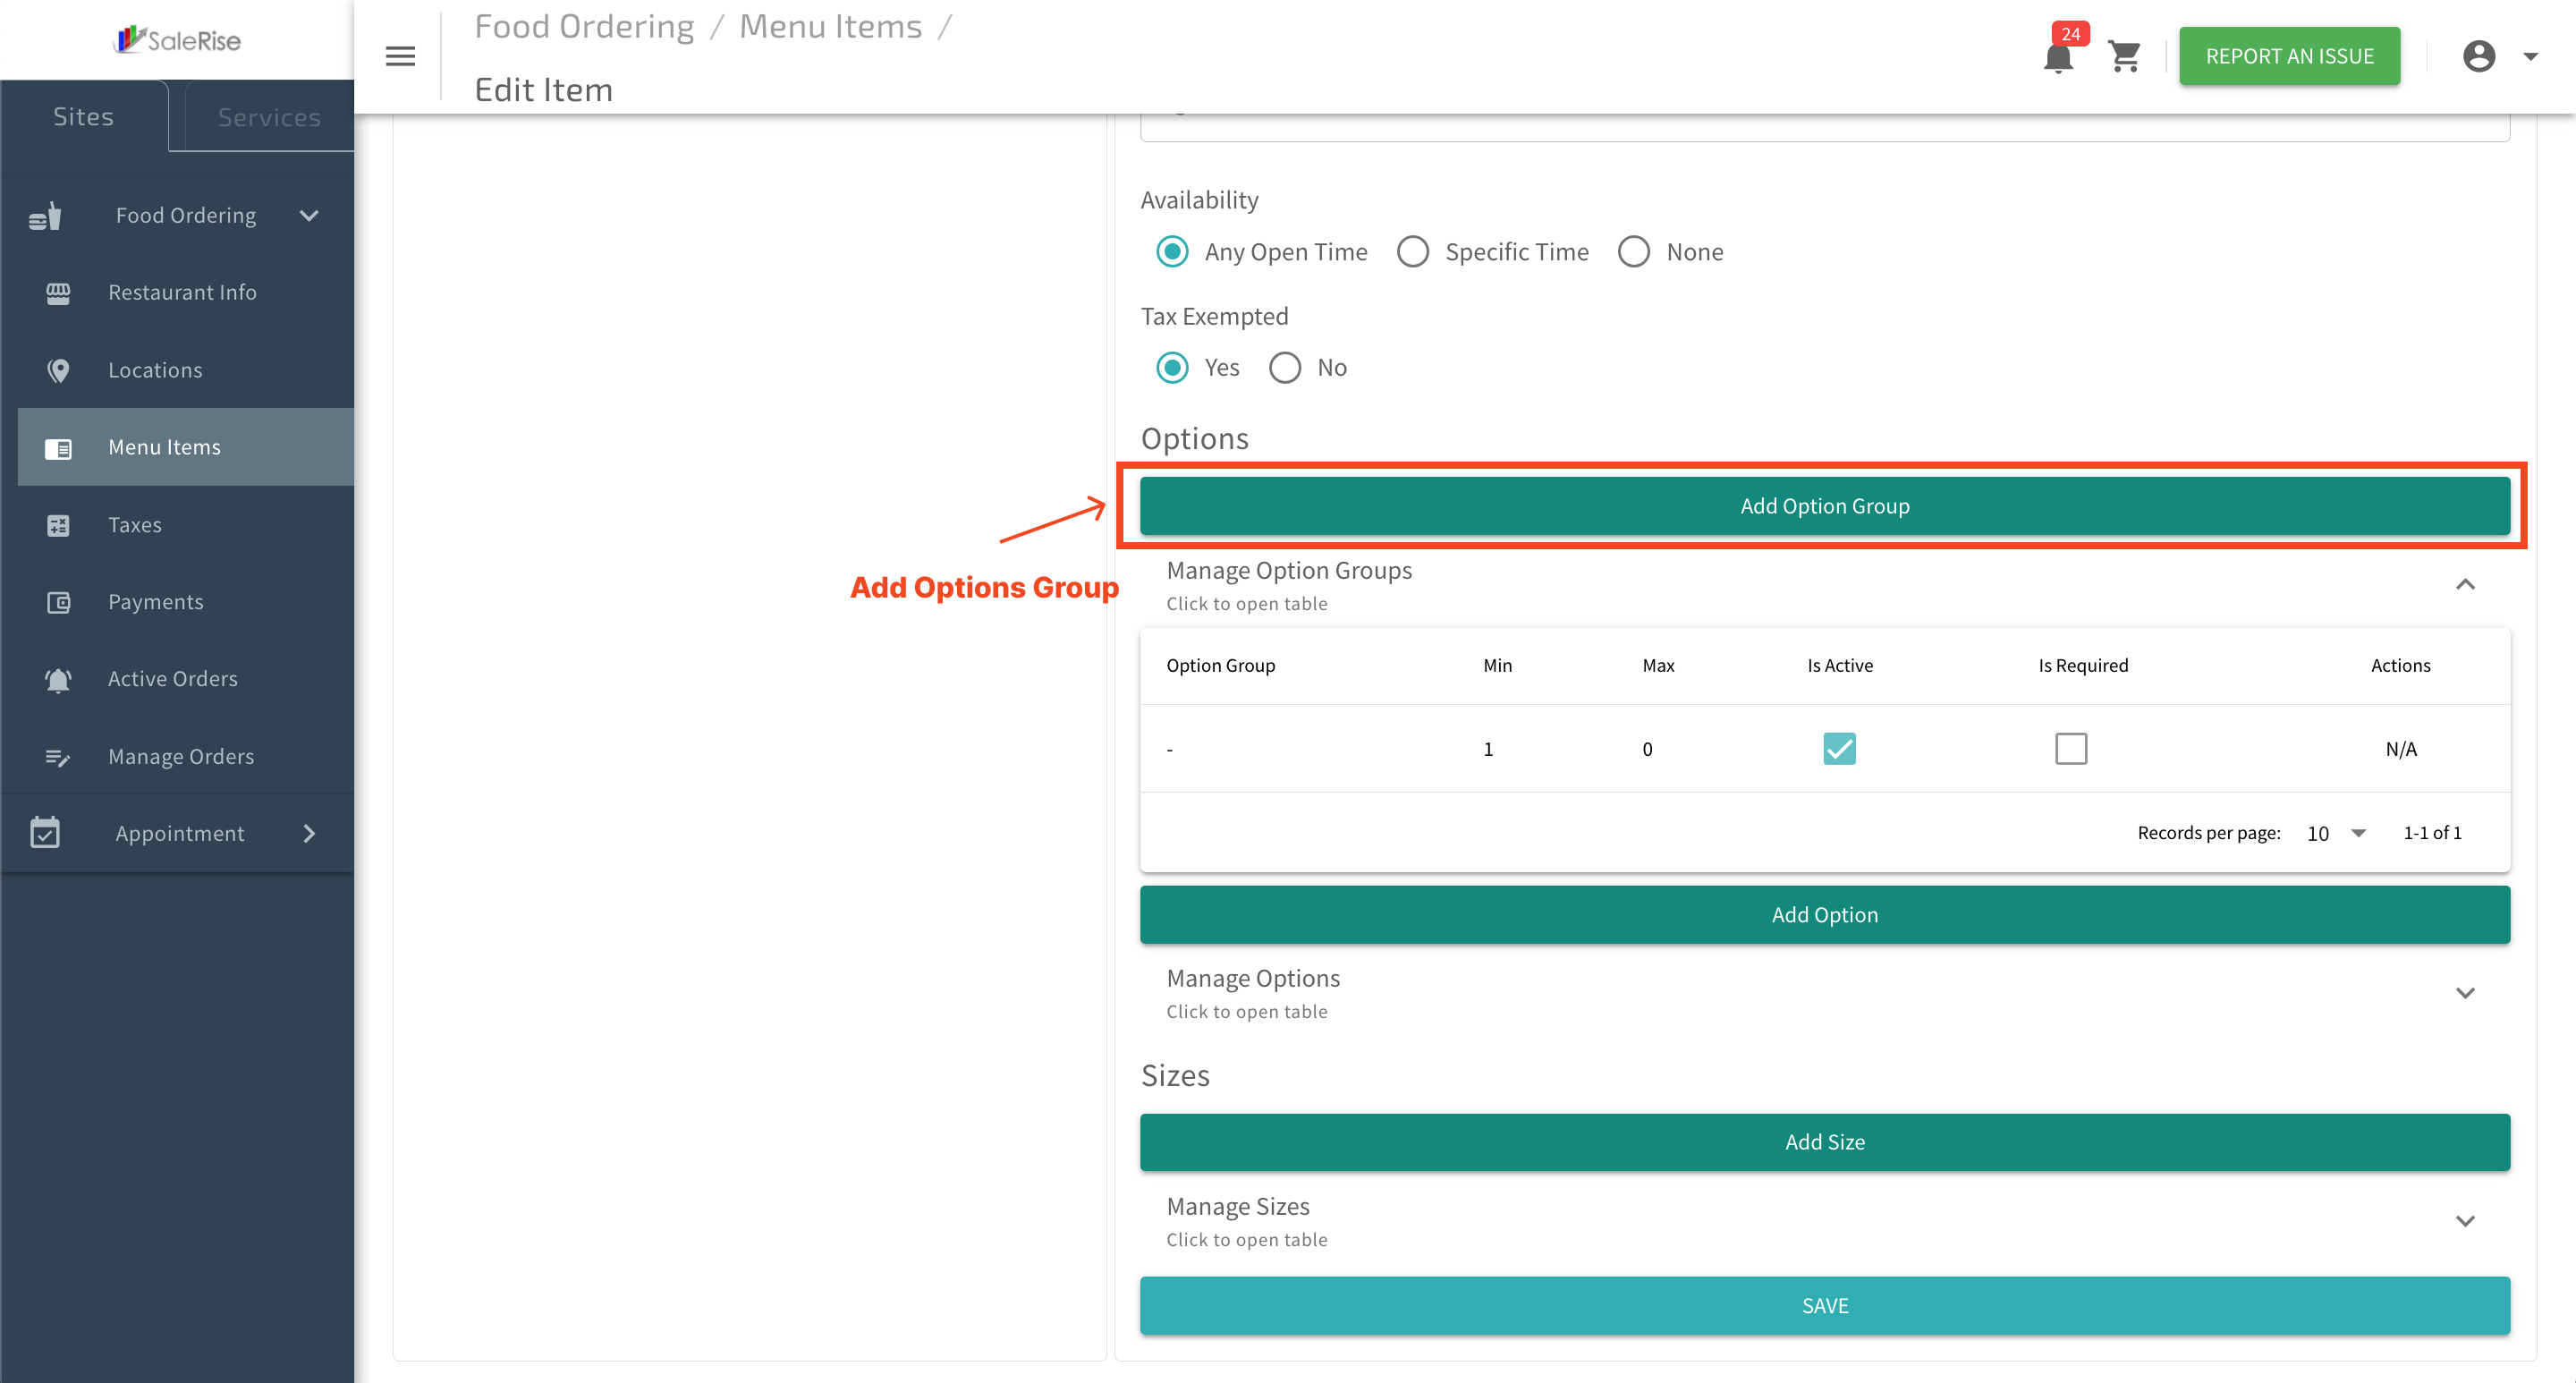
- Option Group Name: Provide a descriptive name for the group.
- Minimum and Maximum Input Fields: Specify the range of input fields allowed.
- Required Checkbox: Indicate if the option is required.
- Active Checkbox: Activate or deactivate the option group.
4. Add Options:
Associate options with the created option group.
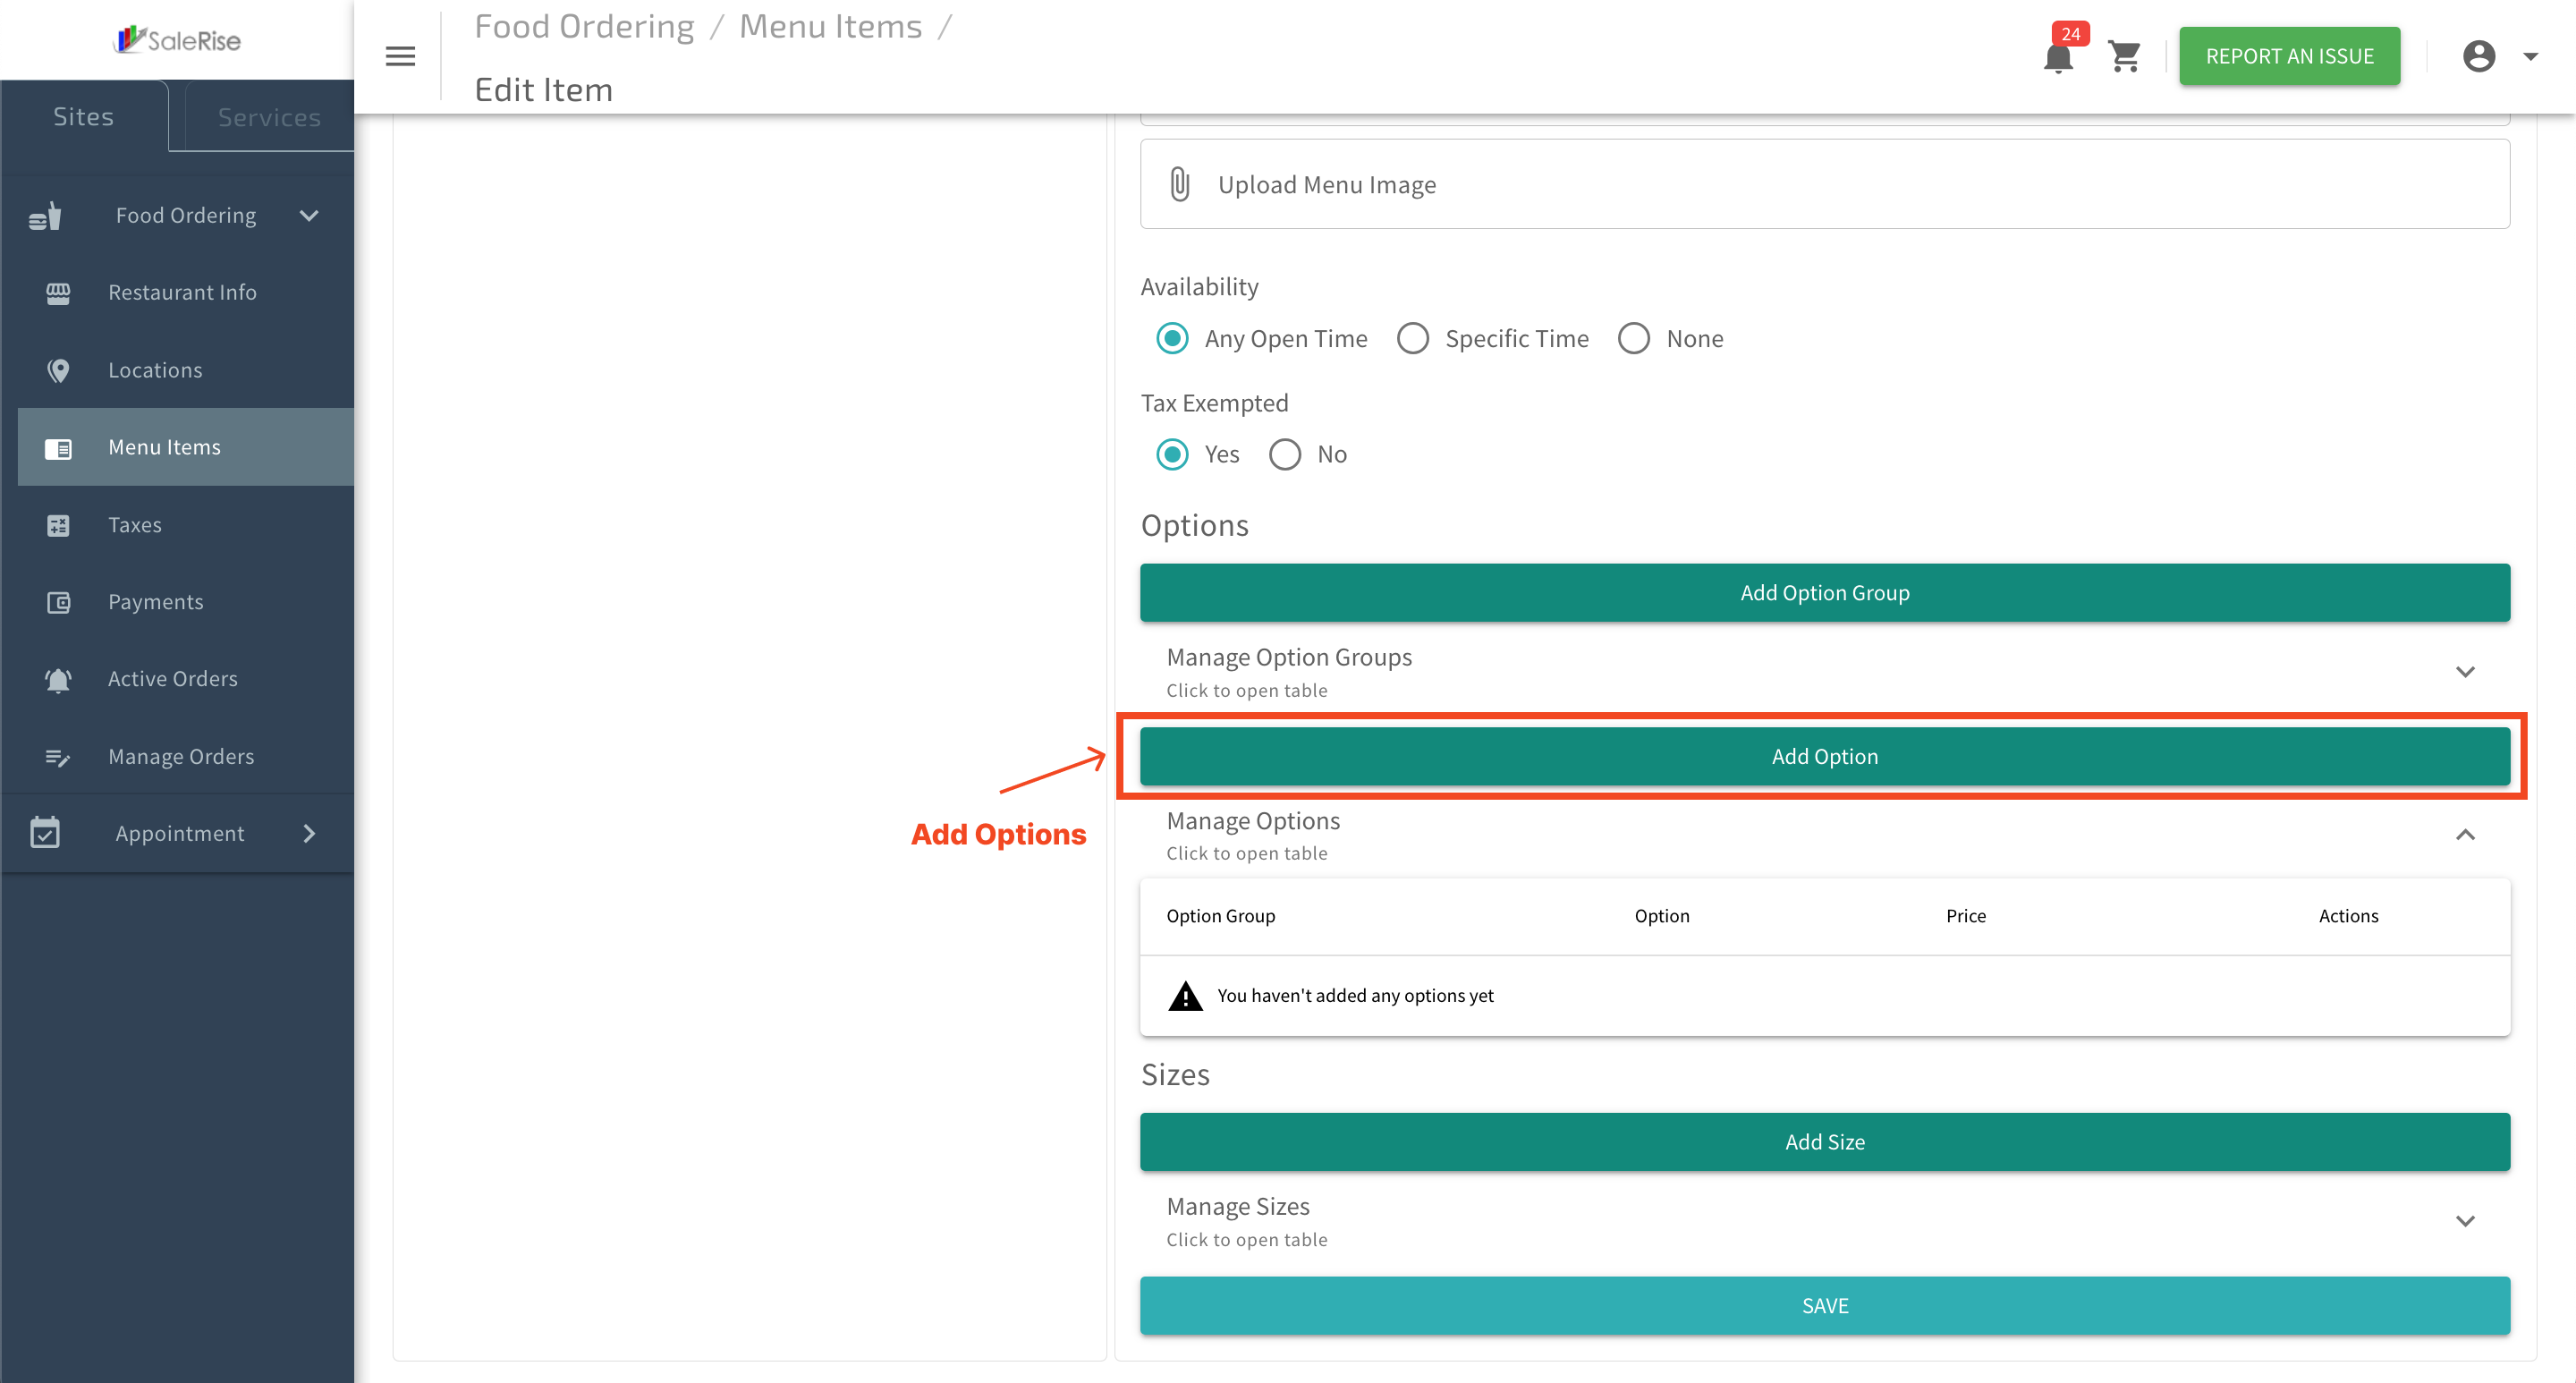
- Select Option Group: Choose the relevant group from the created option groups.
- Label: Provide a label for the option.
- Add Price: Specify an additional price if applicable.
- Active Checkbox: Activate or deactivate the option.

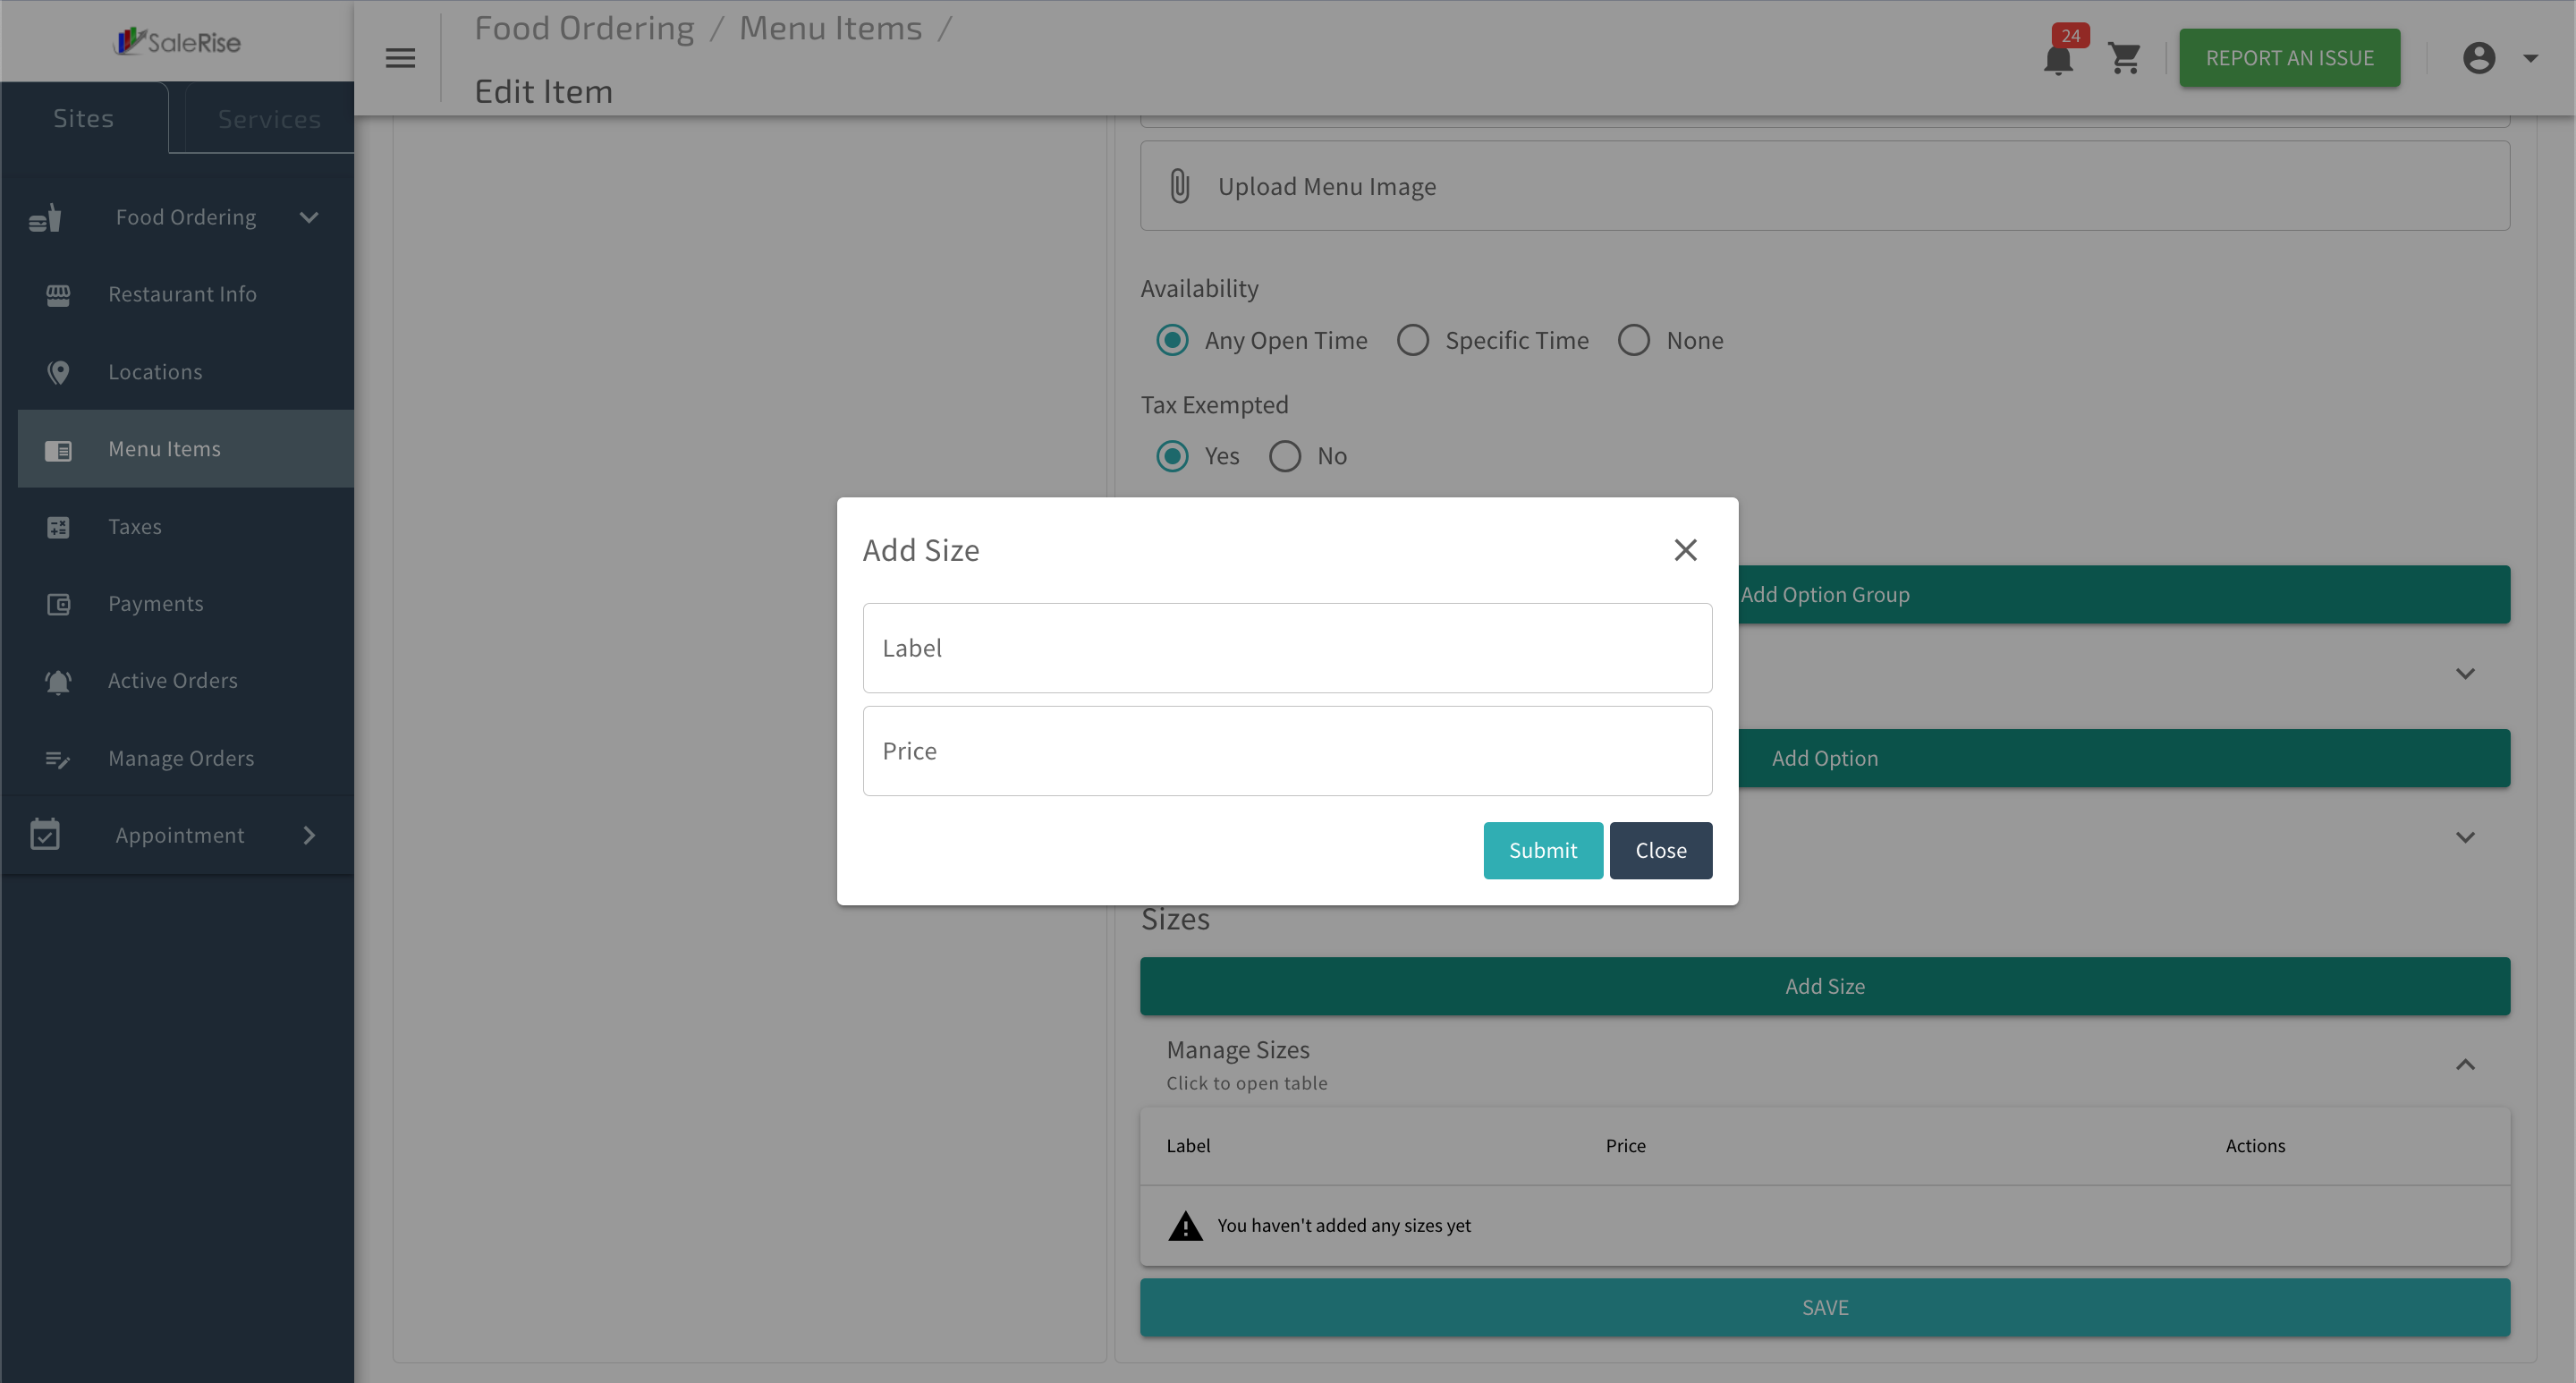
5. Sizes:
Offer size variations for the item.
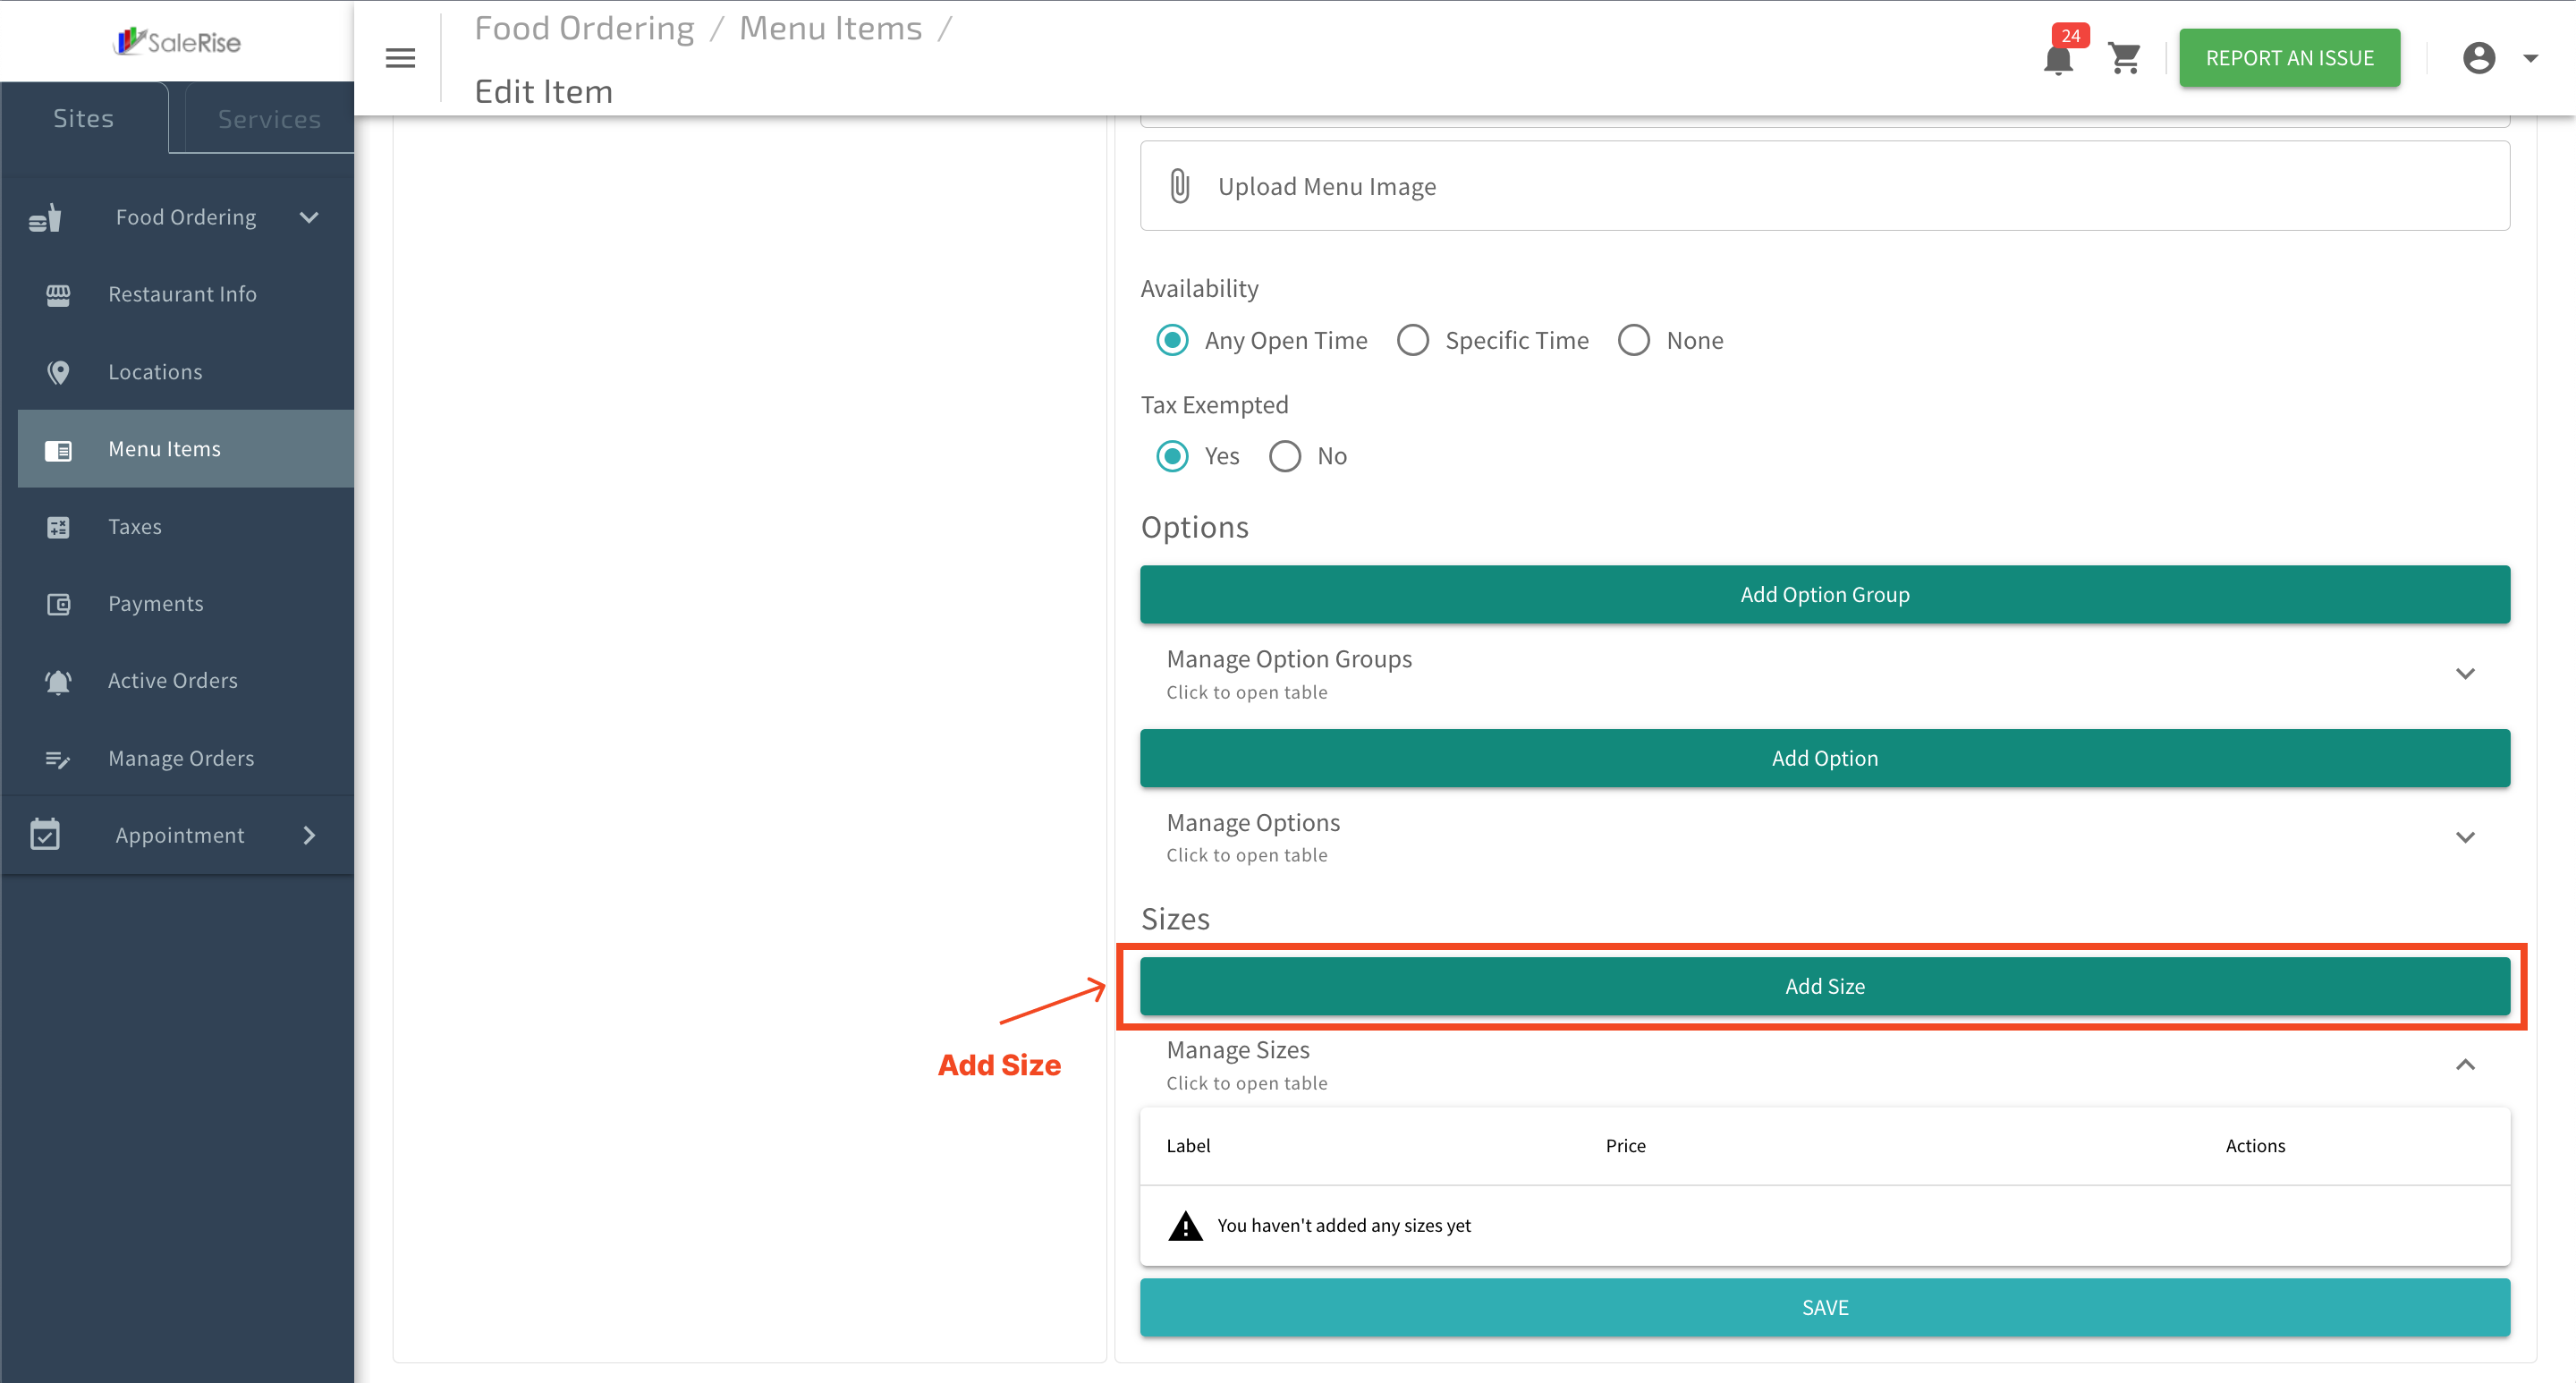
- Label: Name the size (e.g., Small, Medium, Large).
- Add Price: Specify the price difference for each size.
6. Save Changes:
- Click "Save" to confirm the additional details.