Add or Edit Room
Overview:
TheIn "Technicianthe Setup"Hotel module allowsModule, users tocan seamlesslyefficiently create and manage technicians.rooms Fromfor basiceach informationhotel. toThis availability,flow services,outlines tags,the process of adding new rooms, specifying room details such as name, hotel assignment, and maintenanceroom schedules,category. thisAdditionally, moduleusers providescan handle room maintenance, indicating periods when a comprehensiveroom setupis forunavailable.
Steps:
-
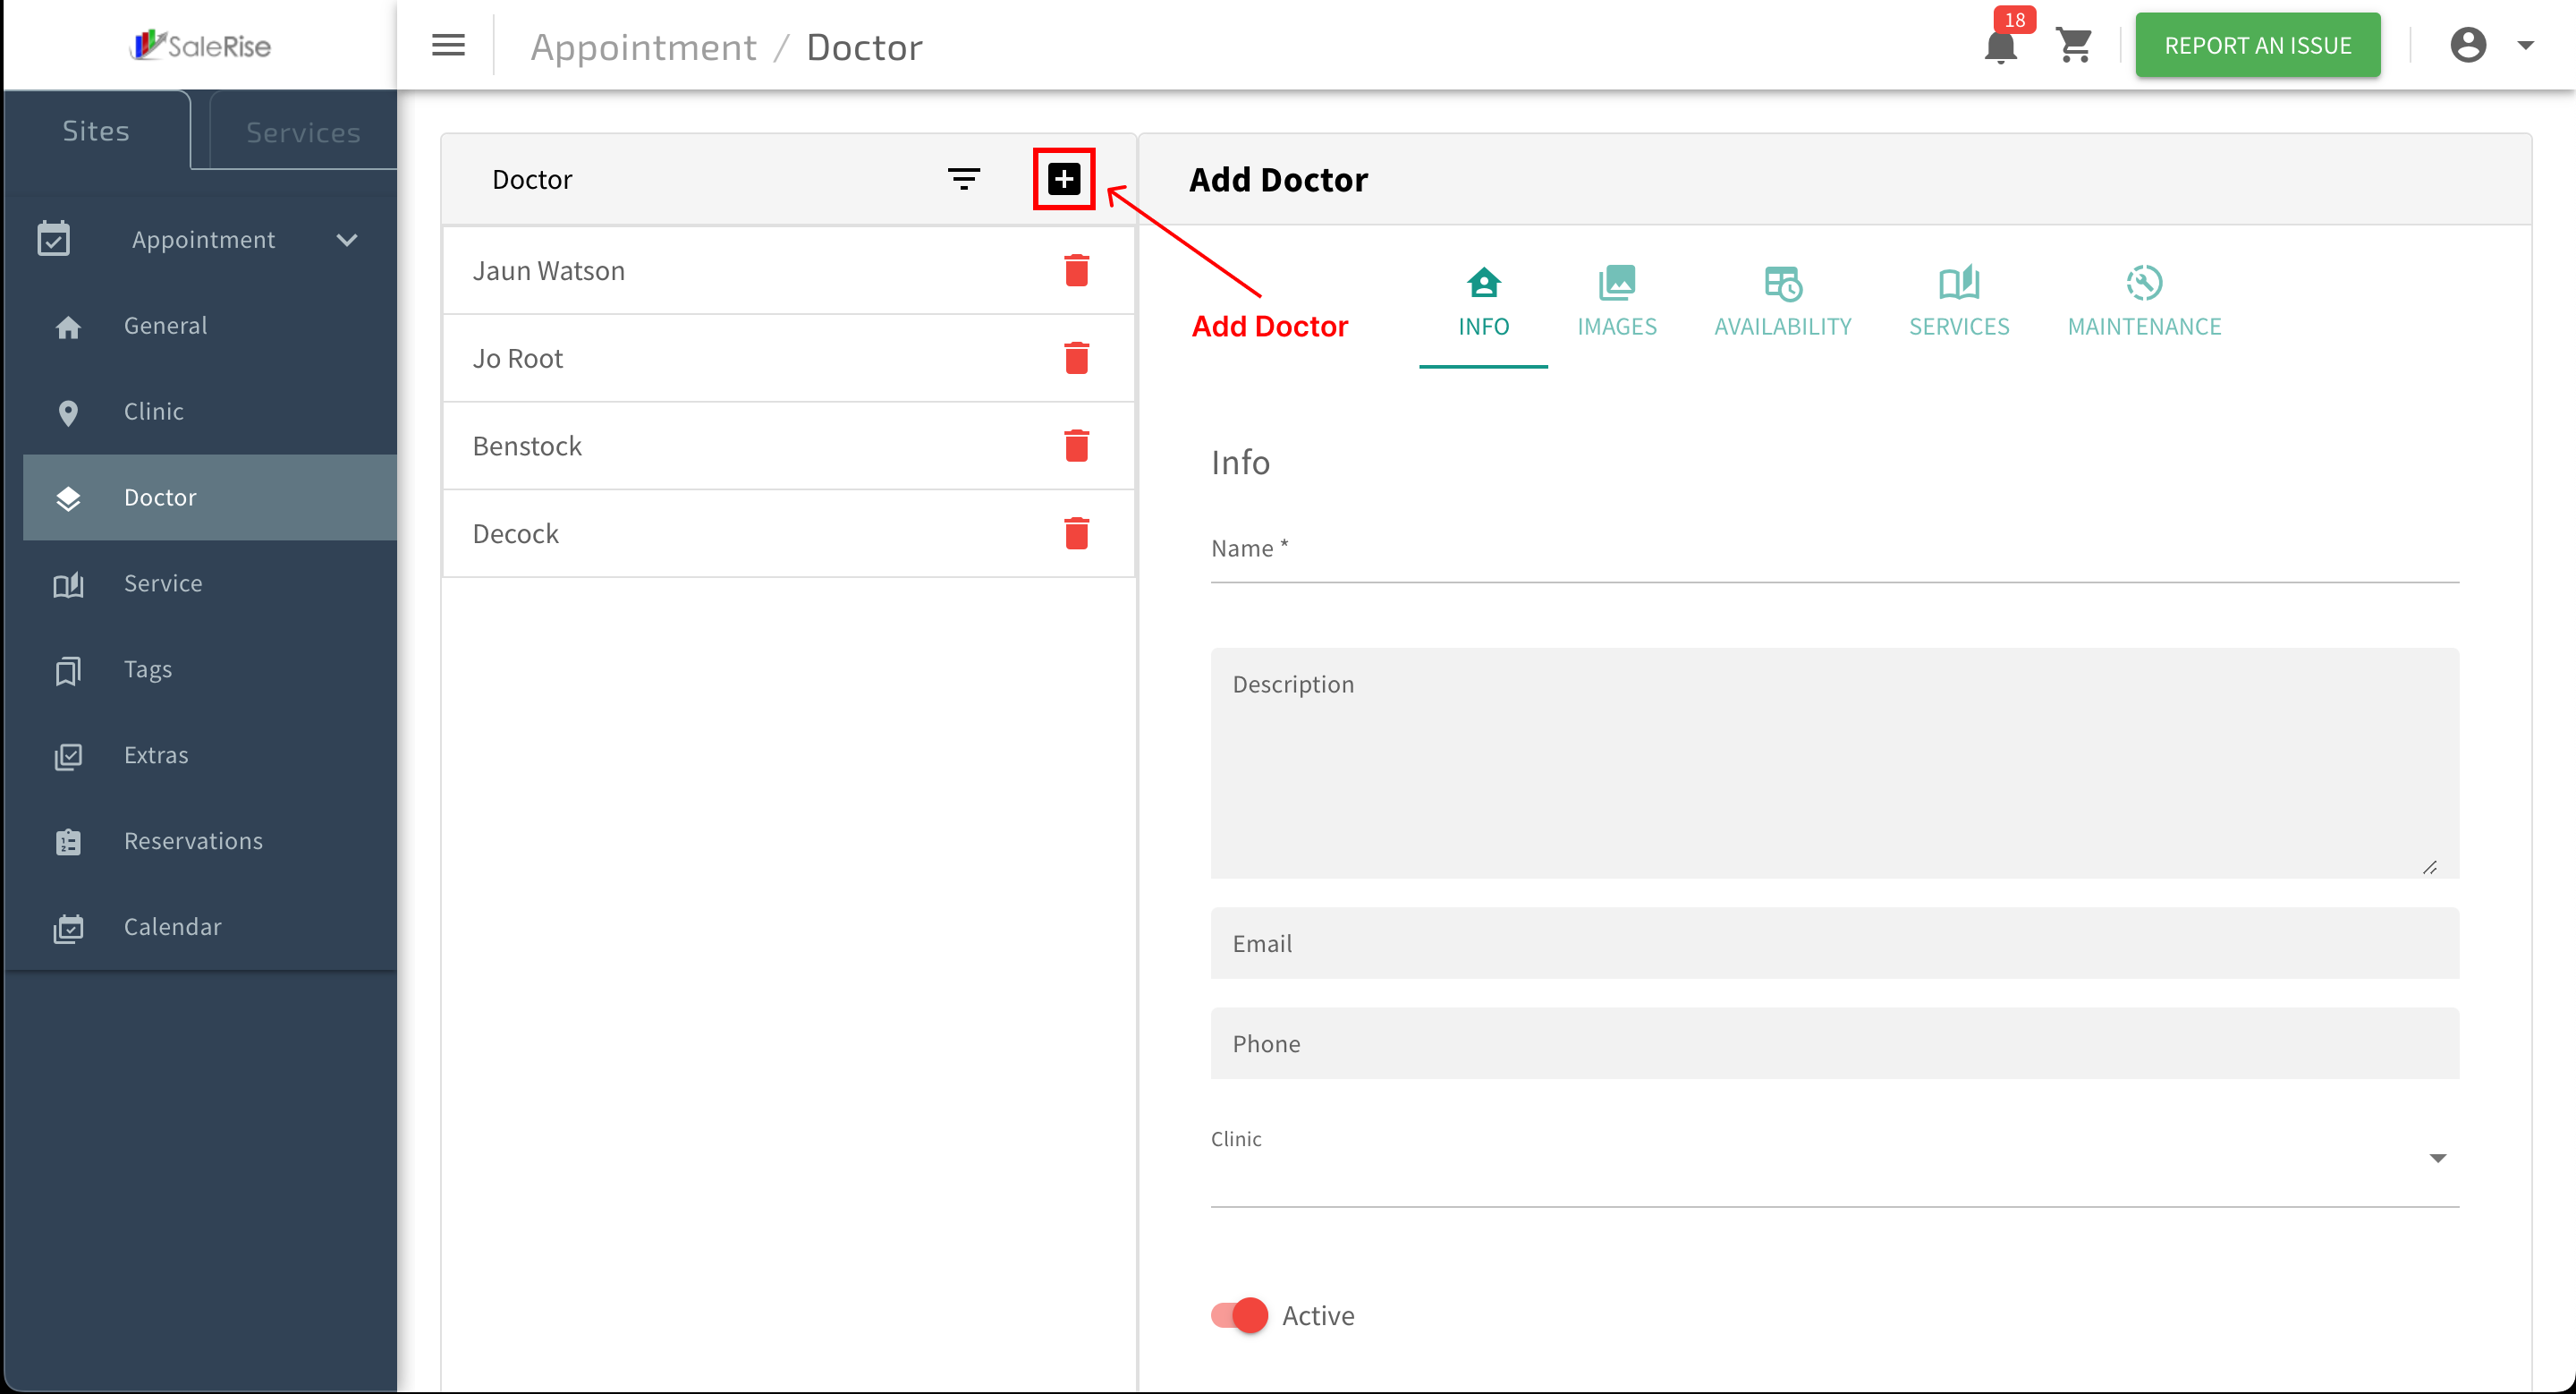
Access "
TechnicianRoom Setup":- Navigate to the "
TechnicianRoom Setup" moduletowithincreatetheor manage doctor profiles.system.
- Navigate to the "
-
Add New
Technician:Room:- Click on "Add New
Technician"Room" to initiate the room setup process.
- Click on "Add New
-
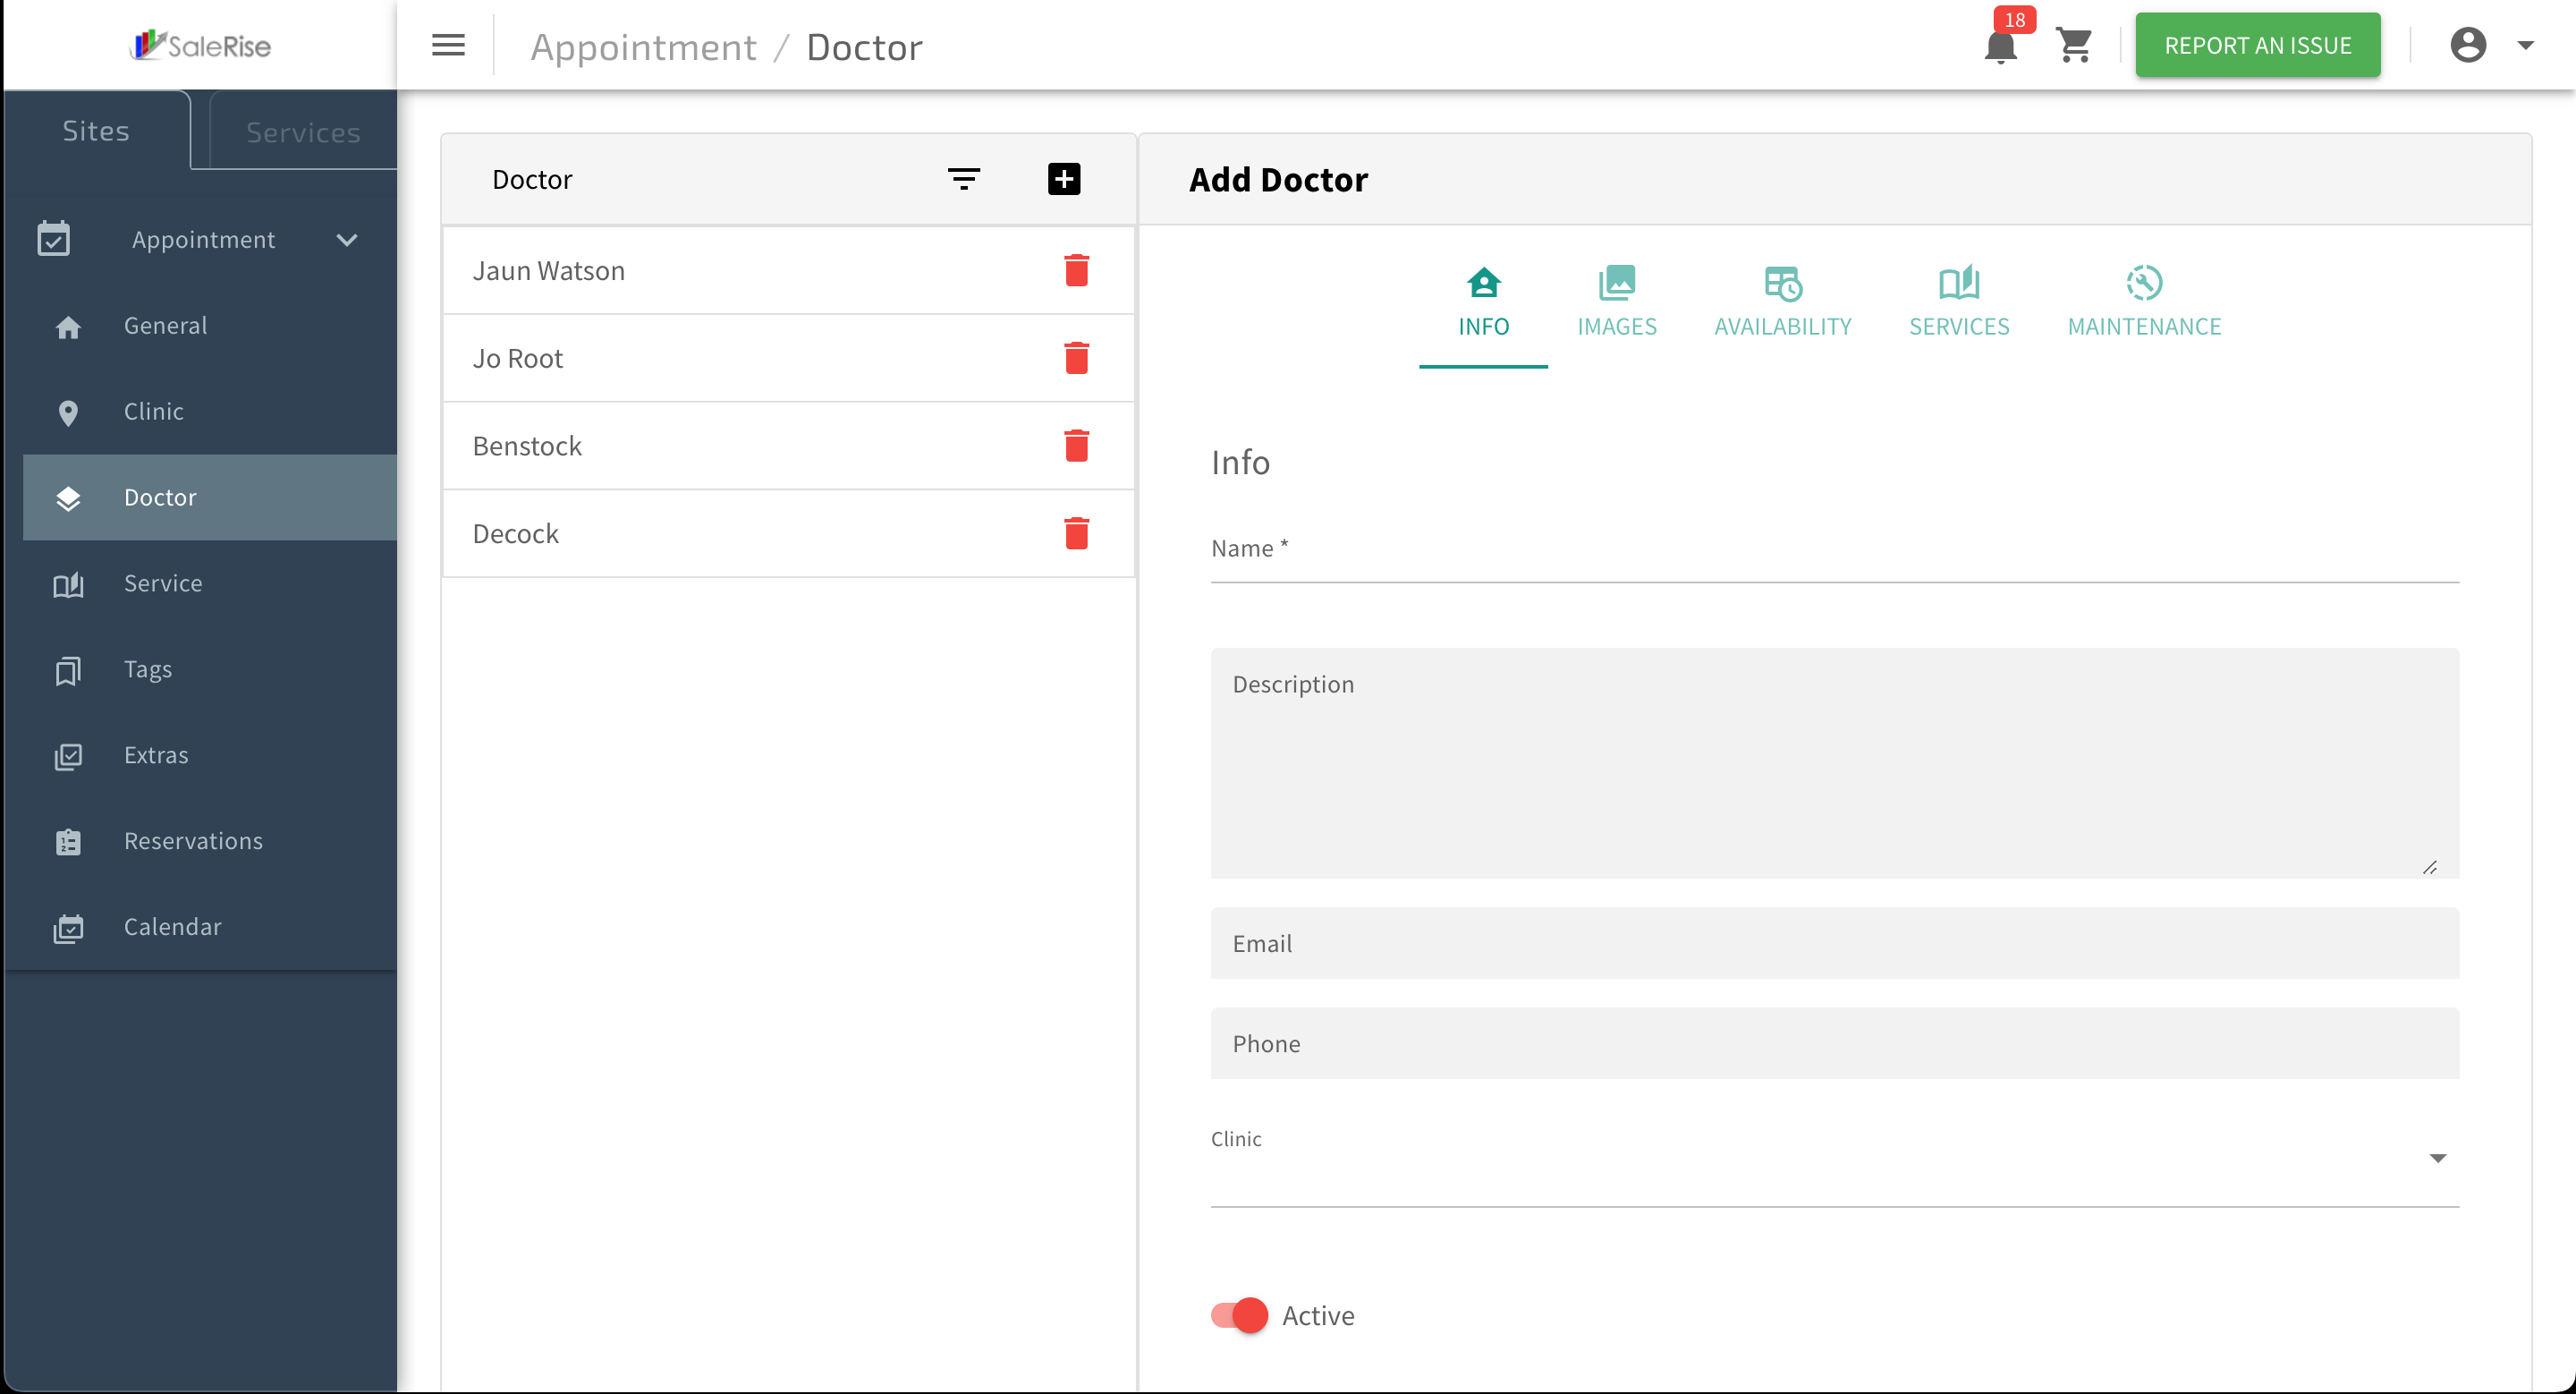
BasicRoomInformation:Details:- Fill in
essentialthe details for thetechnician.new room.- Room Name:
FullProvide a unique nameoffor thetechnician.room. Description:HotelA brief description of the technician.Email, Phone:Contact details for appointments.Company:Assignment: Select thecompanyhotel to which thetechnicianroomis associated.
- Room Name:
- Fill in
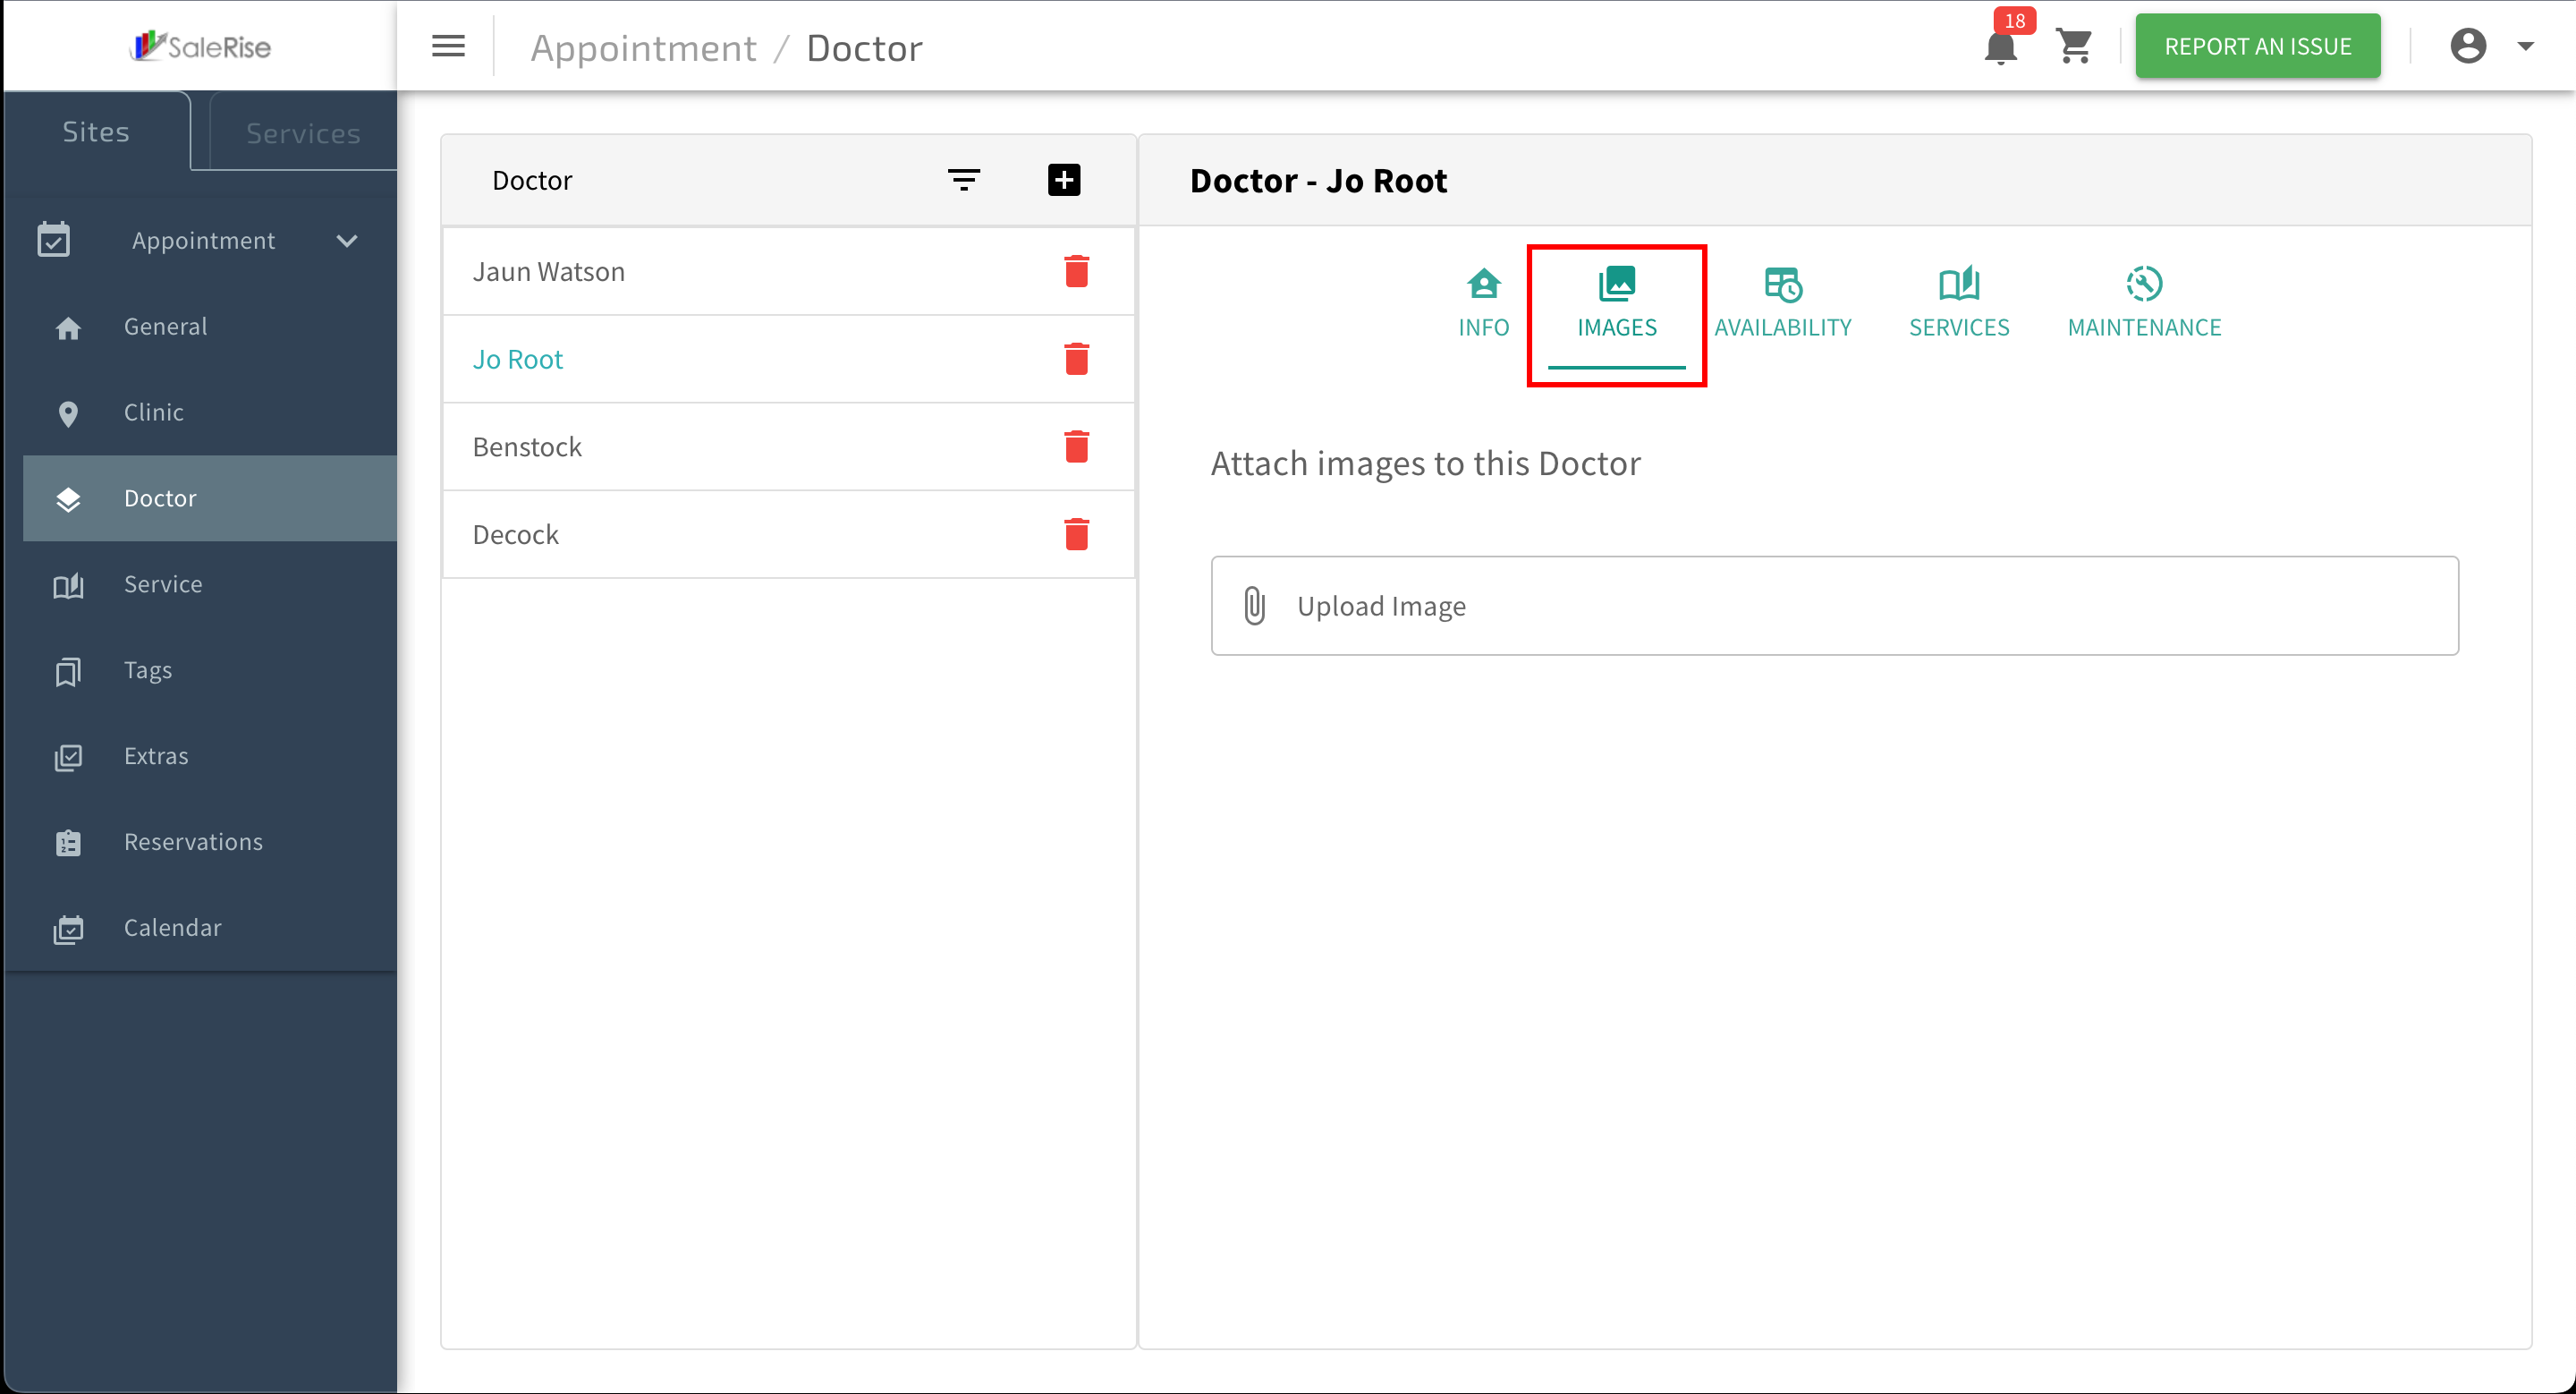
Upload Images:Navigate to the "Images" tab to upload technician images.Multiple Images:Allow users to upload multiple images for the technician.
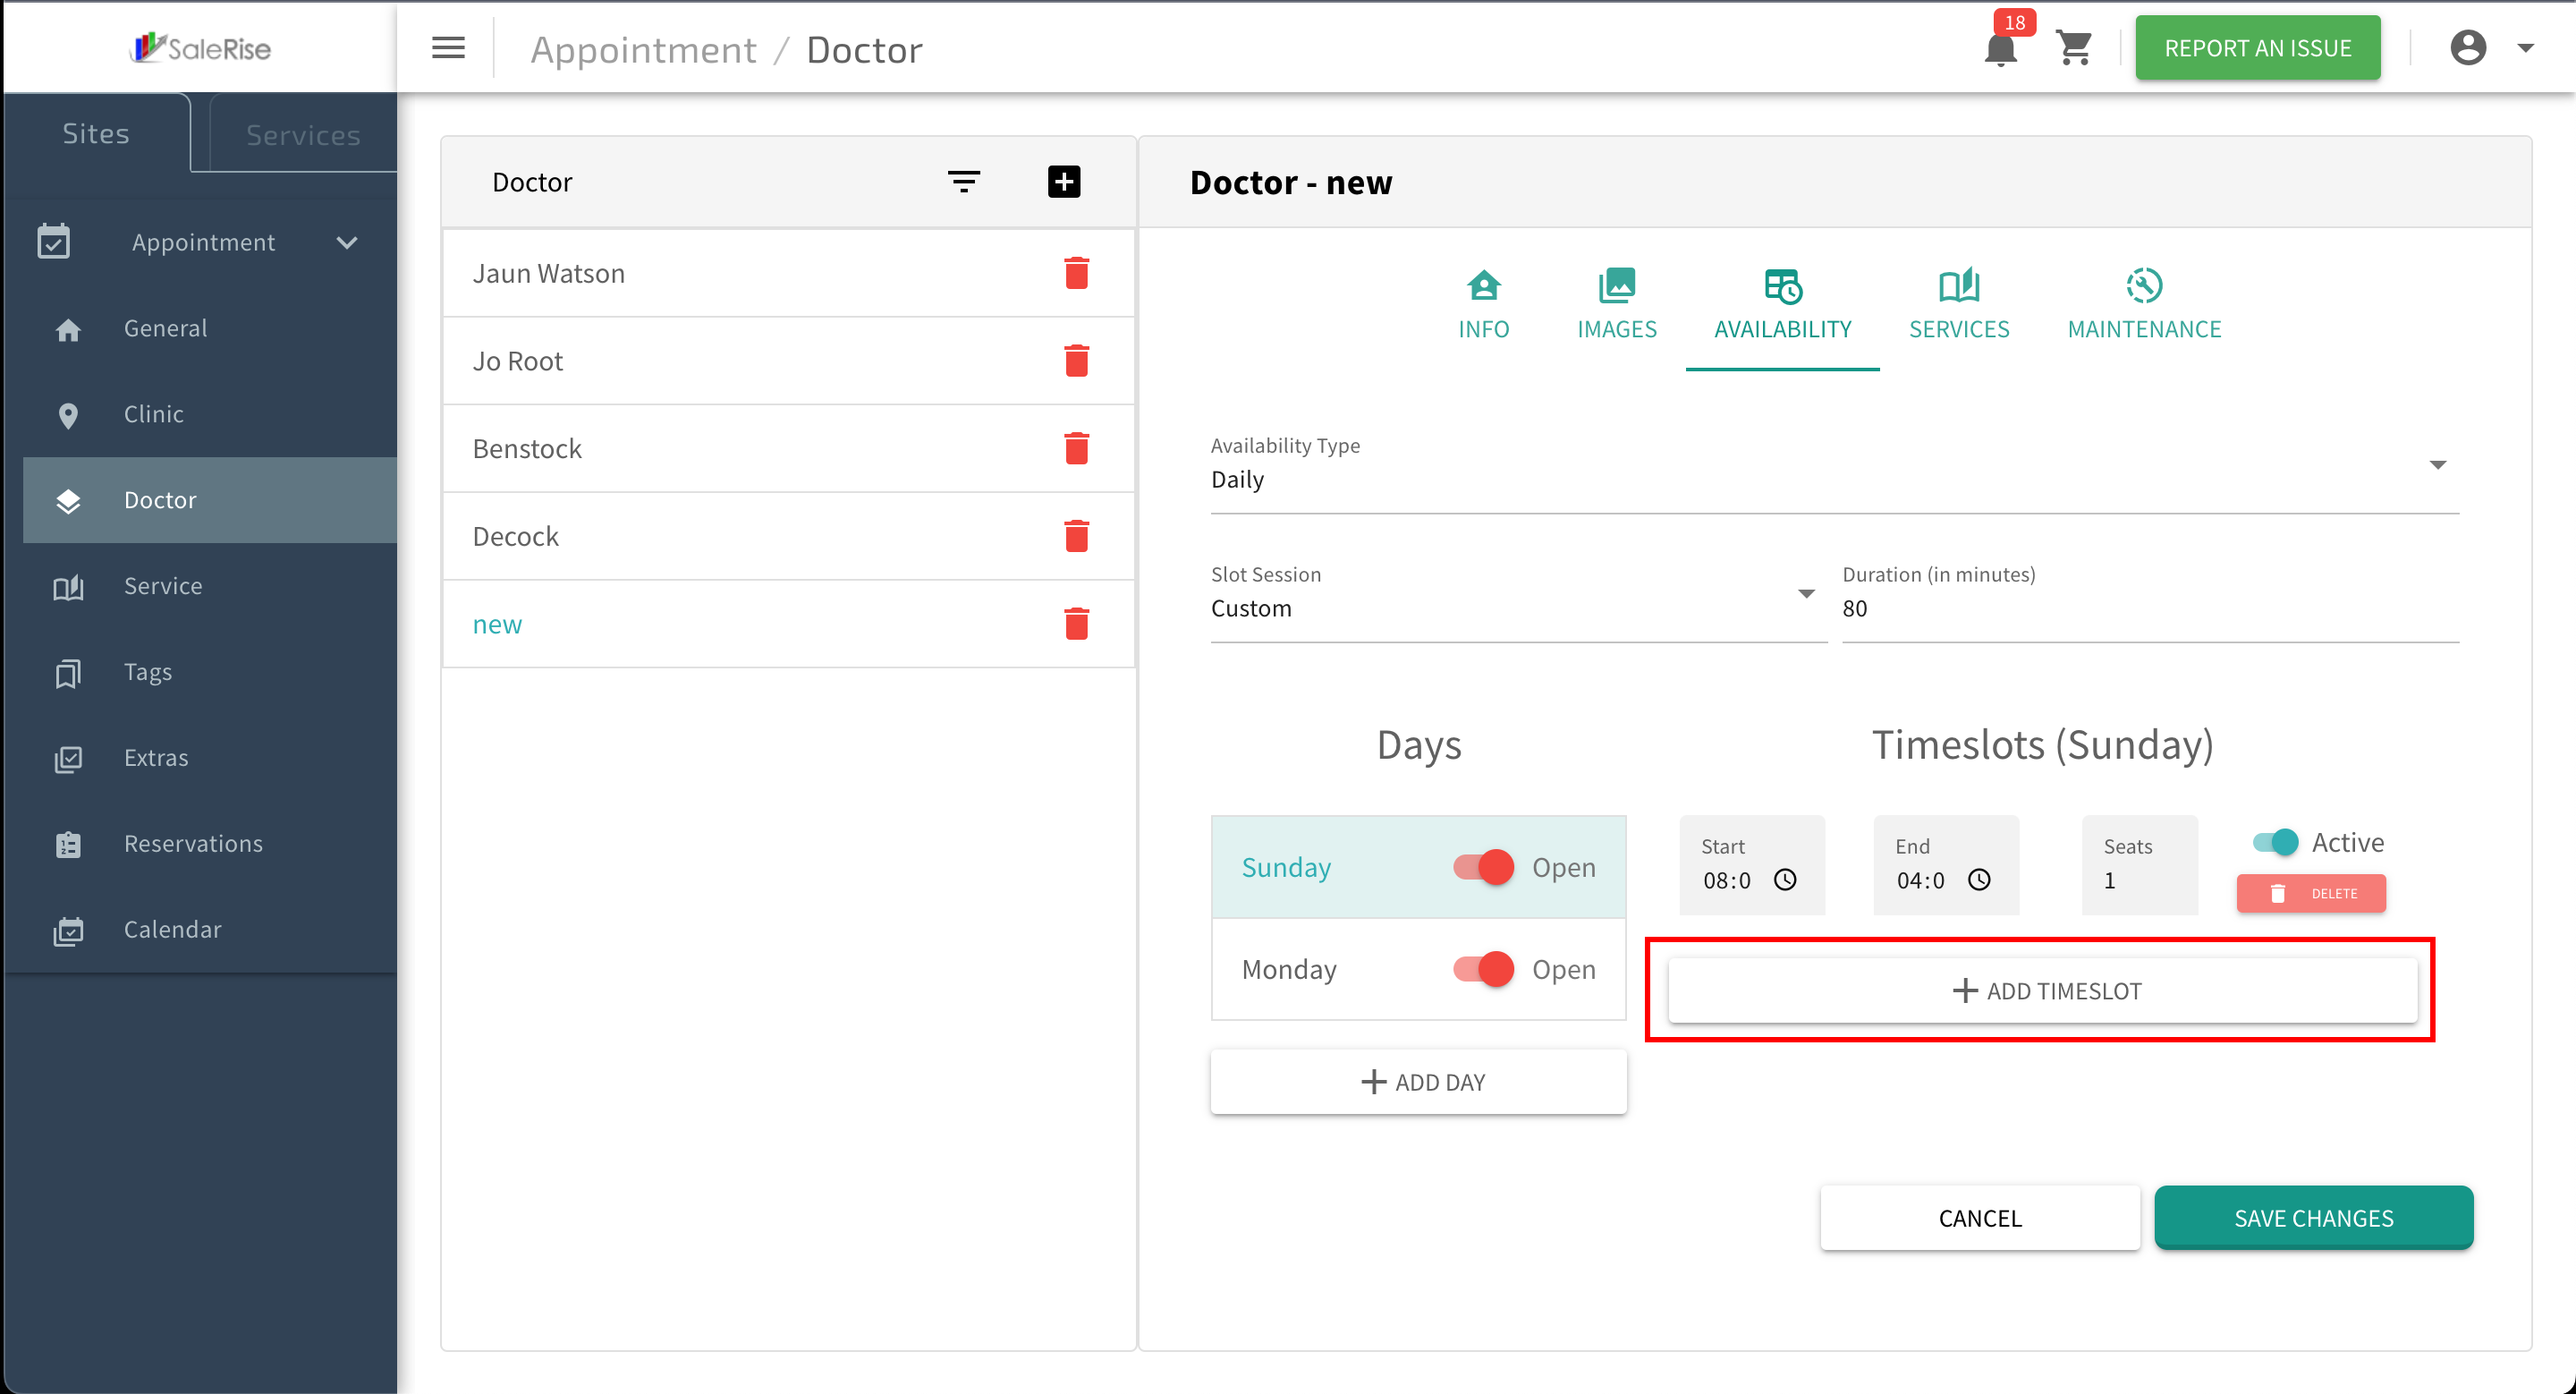
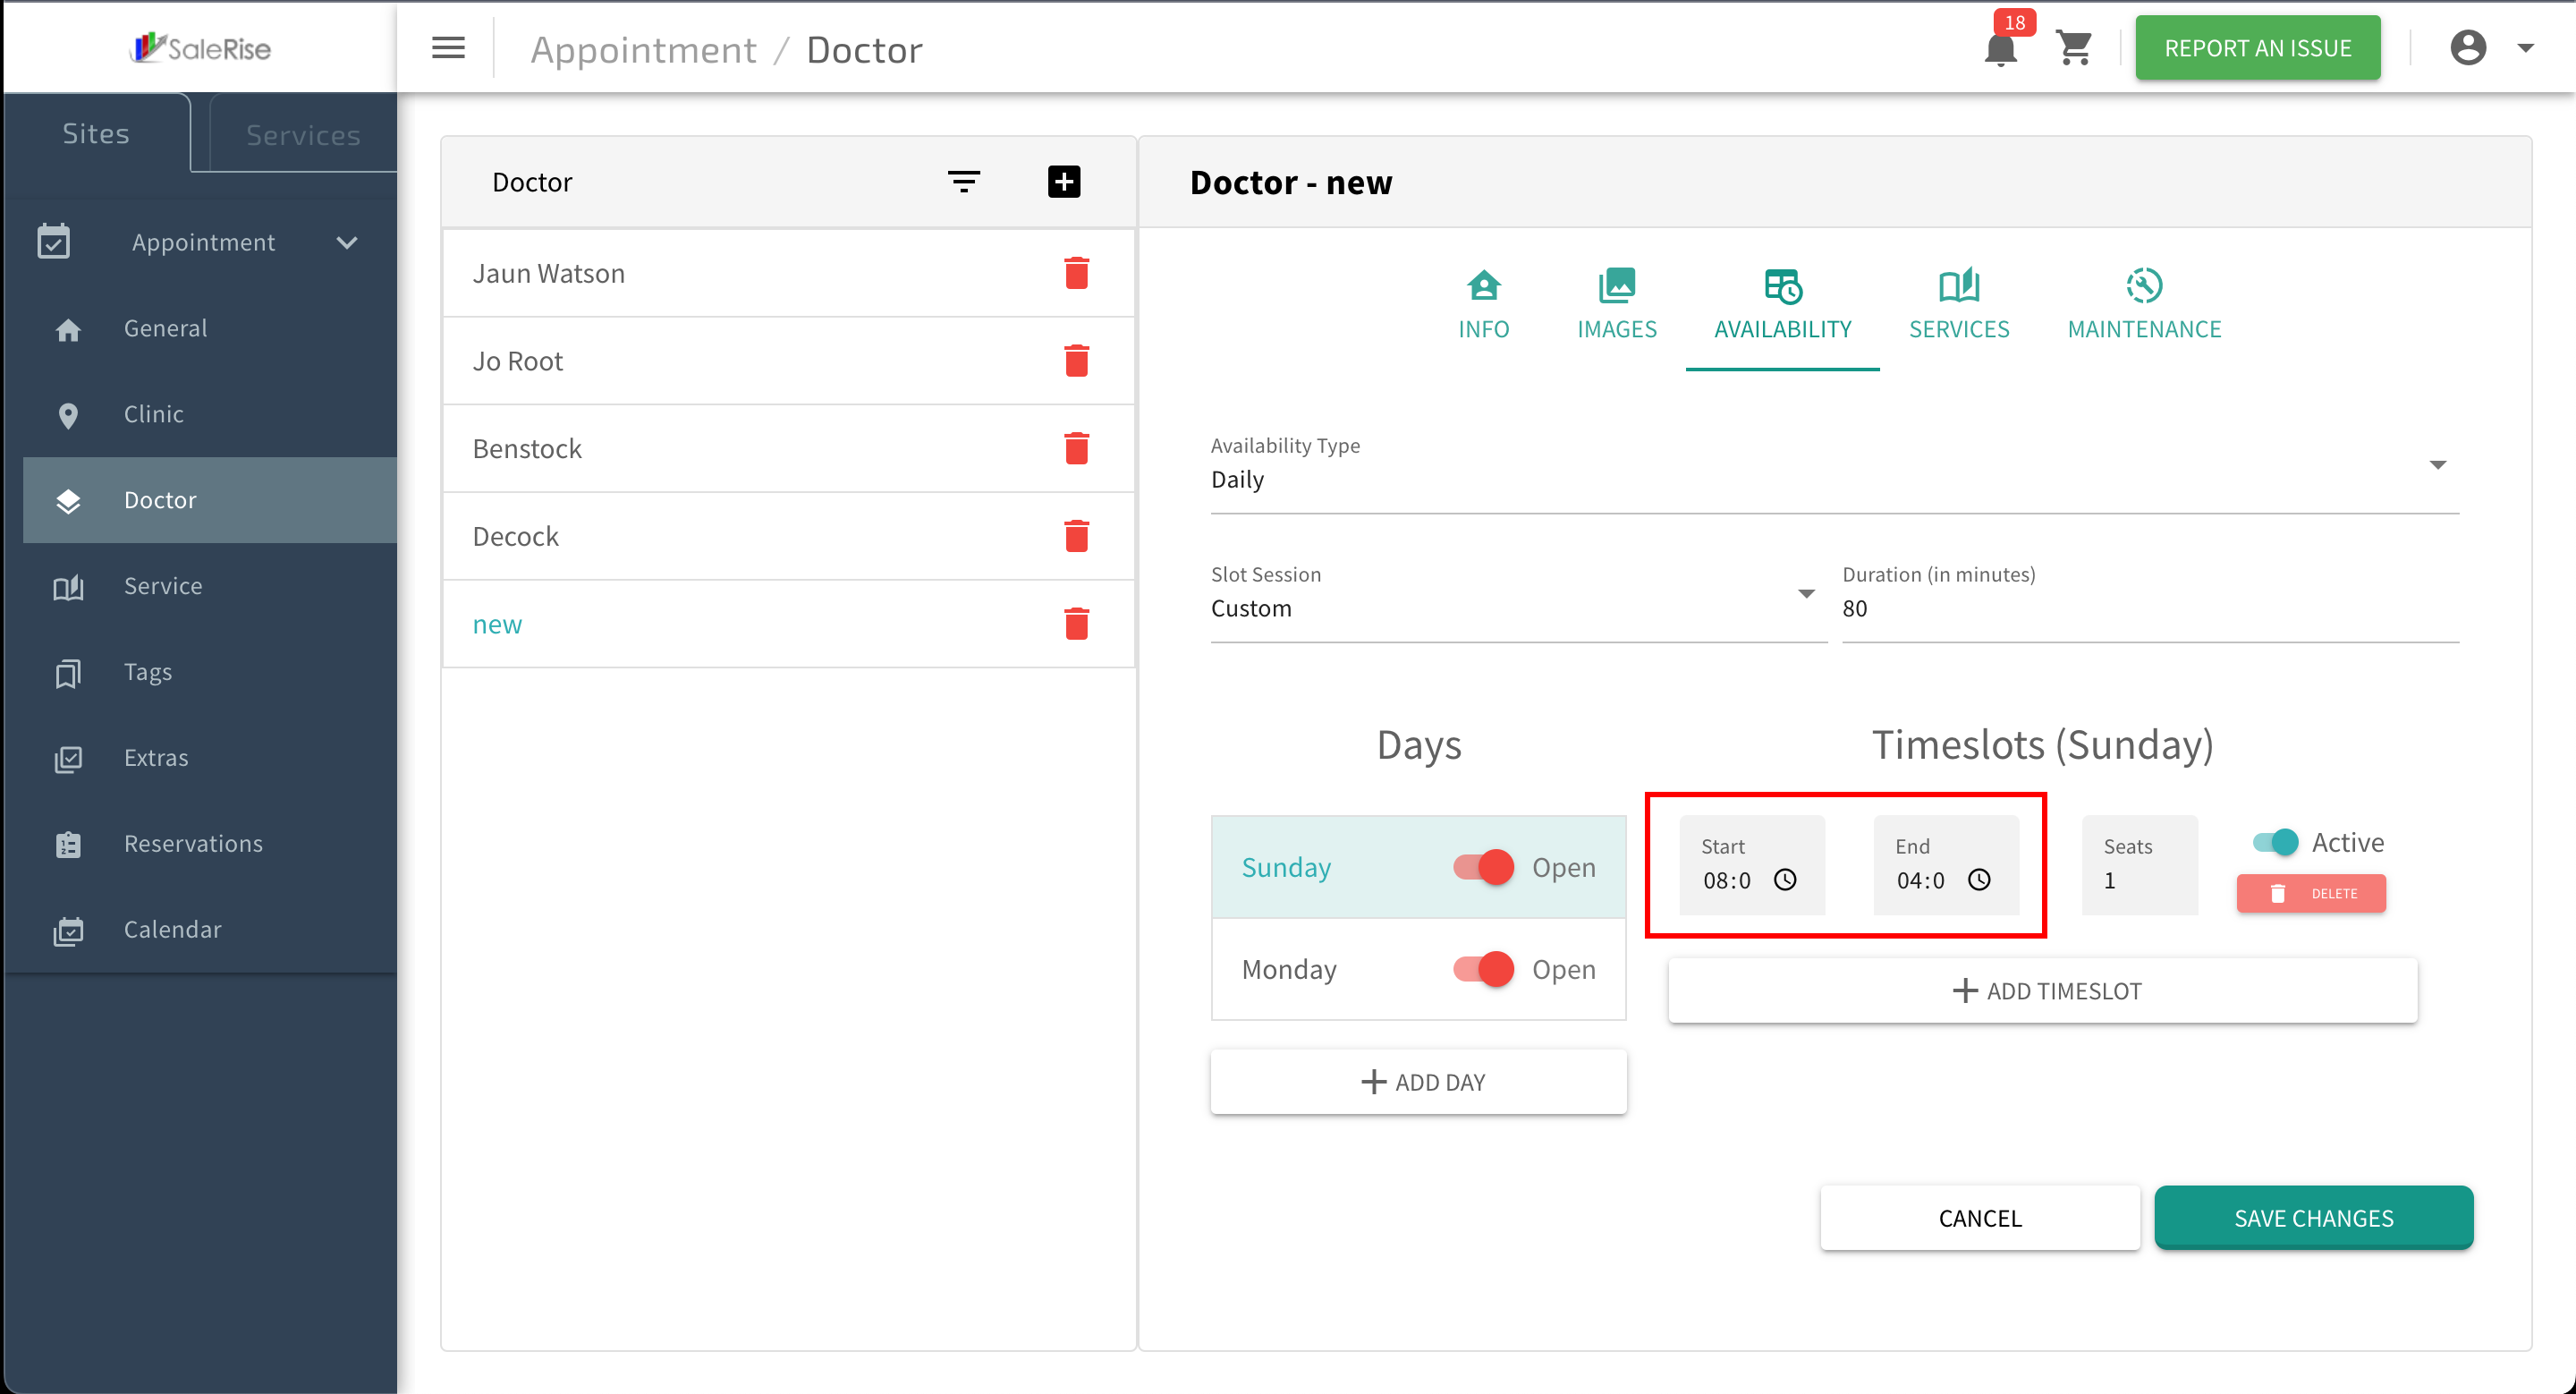
Access "Availability" Tab:Navigate to the "Availability" tab within the technician setup.
Slot Time Configuration:Choose between "Custom Slot Time" or "By Services."Custom Slot Time:Specify the duration of each appointment slot (e.g., 60 minutes for a 1-hour slot).Example: If a custom slot time is set to 60 minutes, each slot represents a one-hour appointment.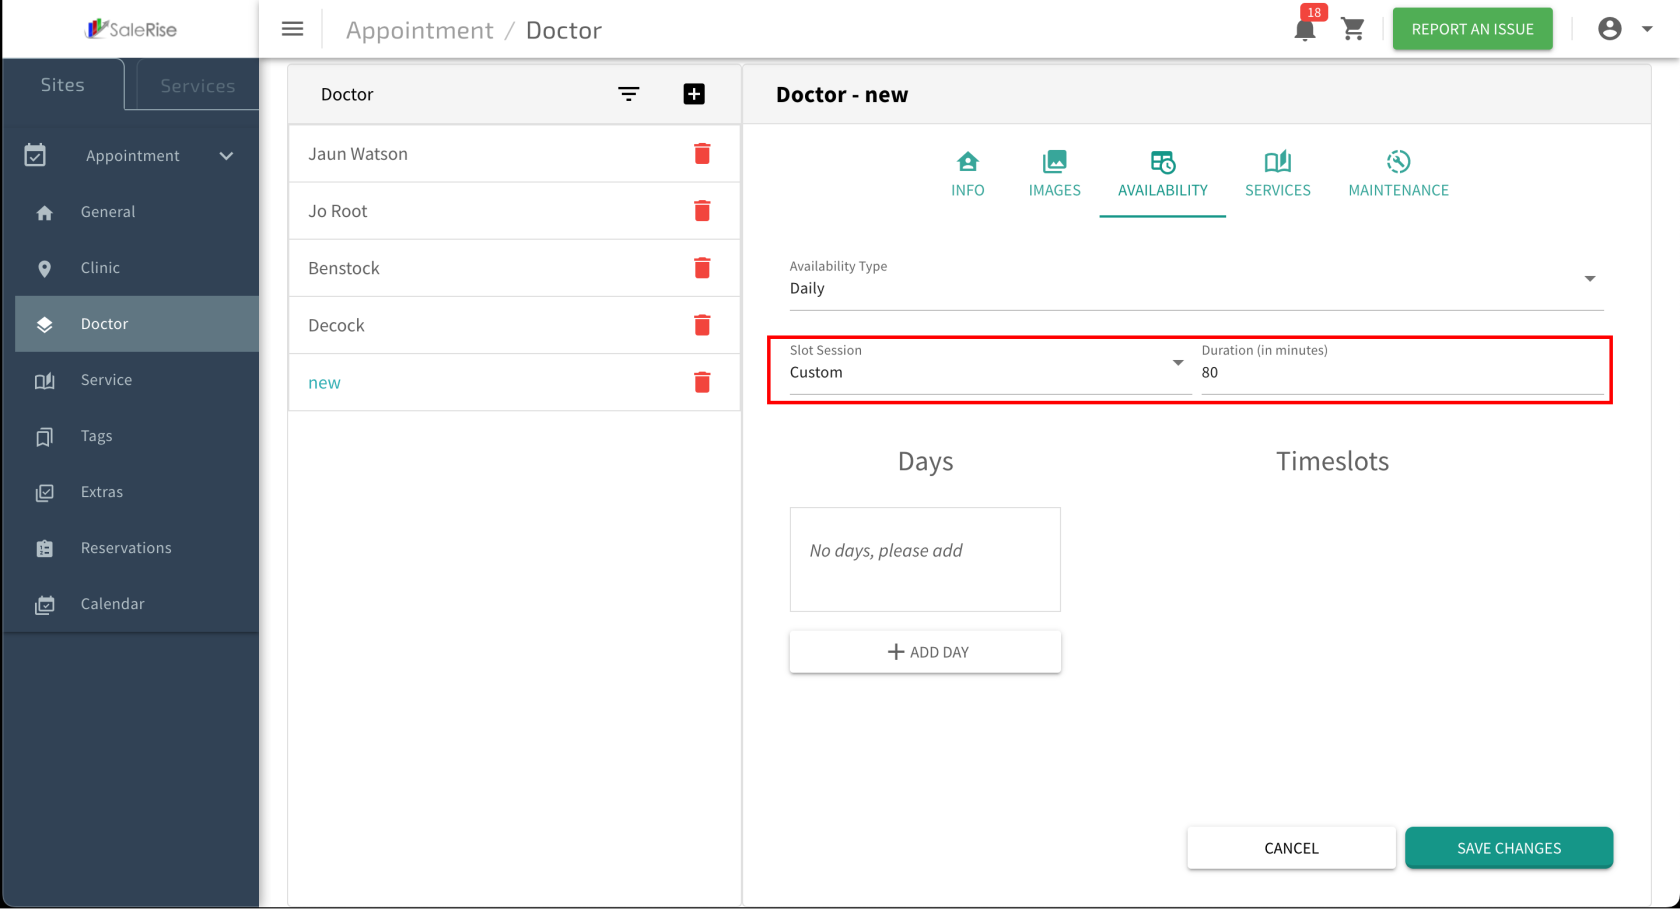
ByRoomServices:Create slots based on the time associated with each service.Example: If a service takes 30 minutes, slots will be generated accordingly.
Add Days of Availability:Click on "Add Days" to specify the days the technician is available.Select Days:Choose the days the technician will be available for appointments.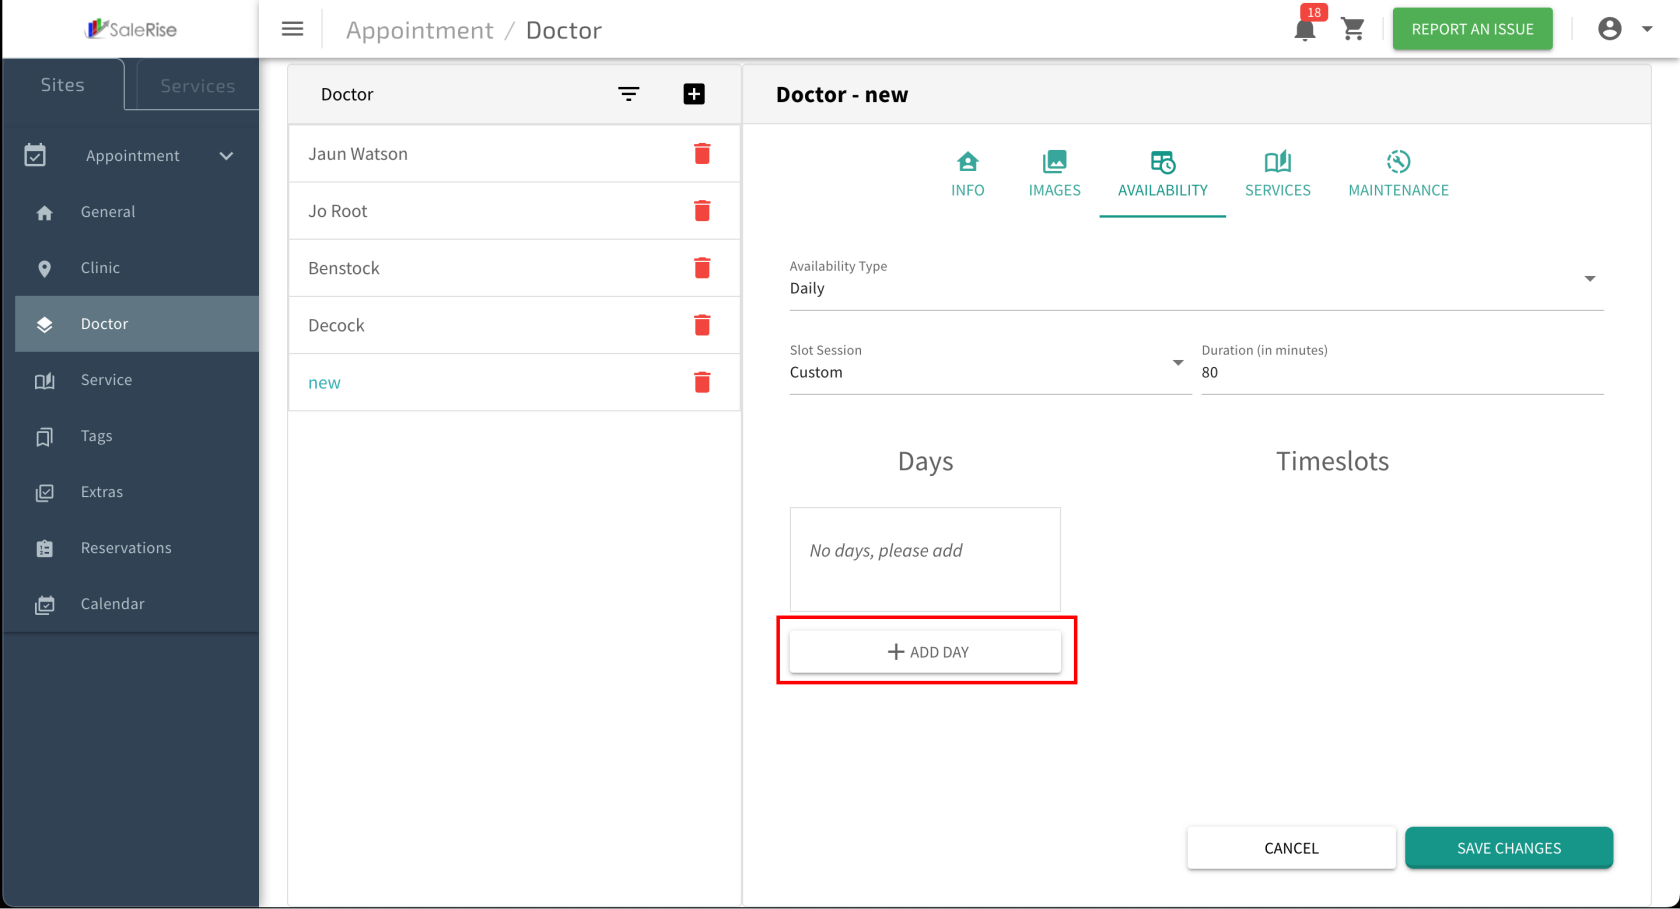
Example: Select these days if a technician is available on Mondays and Wednesdays.
Time Slot Configuration:For each selected day, add multiple time slots:
Start Time and End Time:Define the beginning and end of the working hours.
Example: If working hours are from 9:00 AM to 5:00 PM, set the start and end times accordingly.
Seats:Category: Specify thenumbercategory or type ofbookingstheallowed in each time slot.
Example: If there are five seats, five customers can book appointments in that time slot.
-
Save
TimeRoomSlots:Details:- Click "Save" to confirm the
configureddetailstime slots.Example: After saving,of thesystemnewgenerates slots based on the specified times for each selected day.
- Click "Save" to confirm the
-
Services Assignment:In the "Services" tab, assign services to the technician.Assign Multiple Services:Link various services to the technician.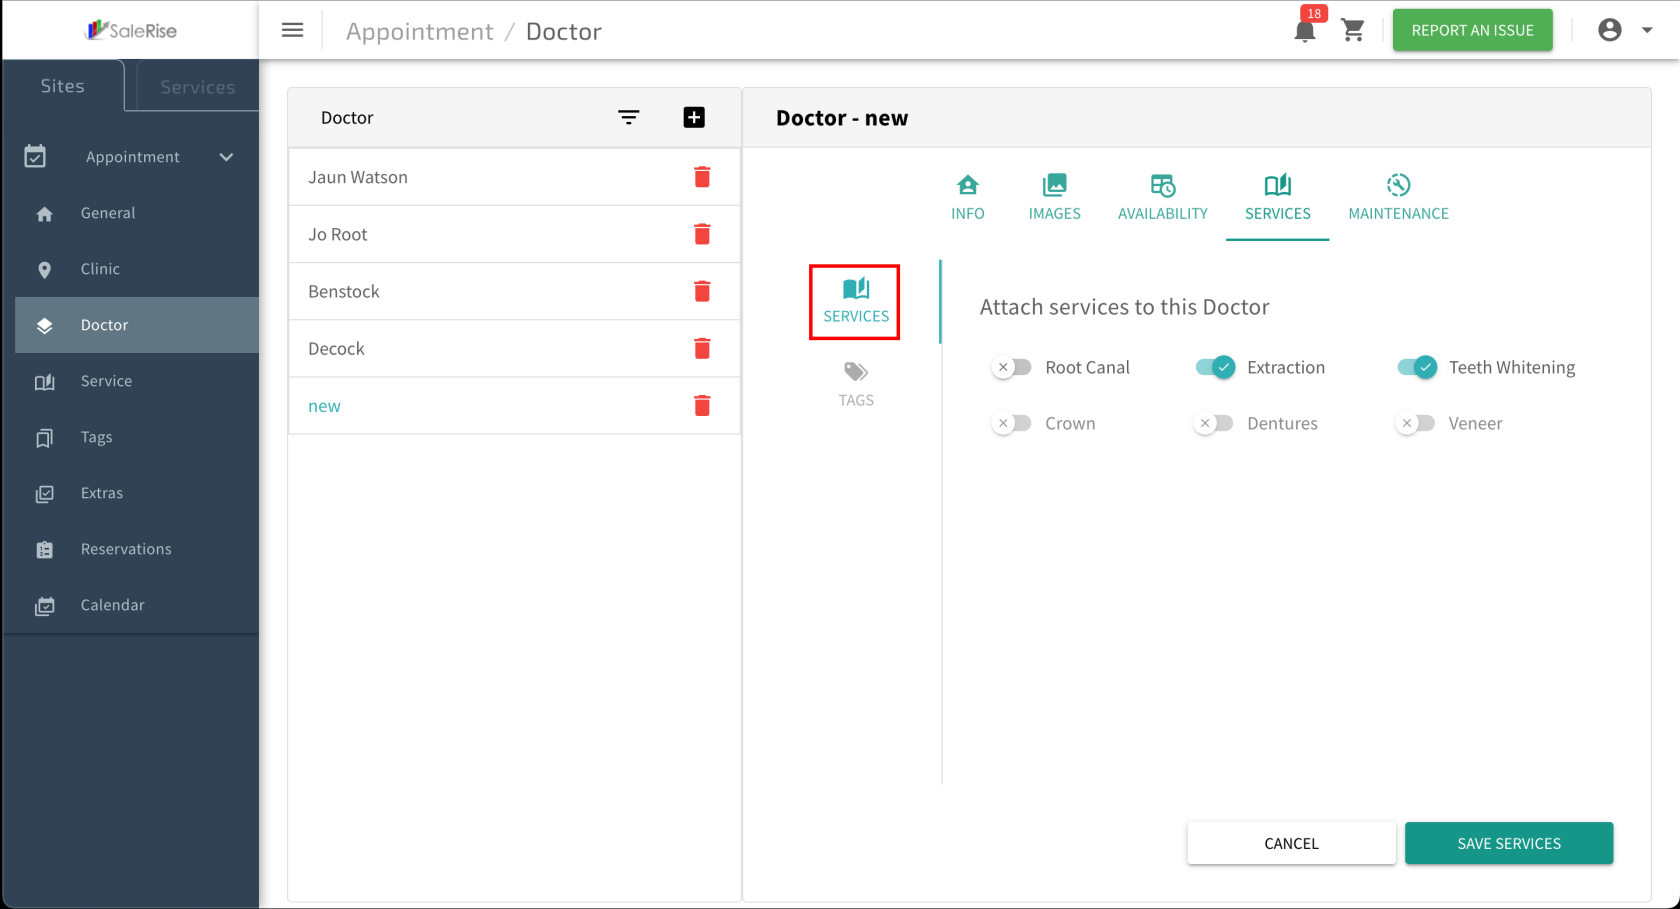
Tags:Add tags to categorize services (e.g., free, not included).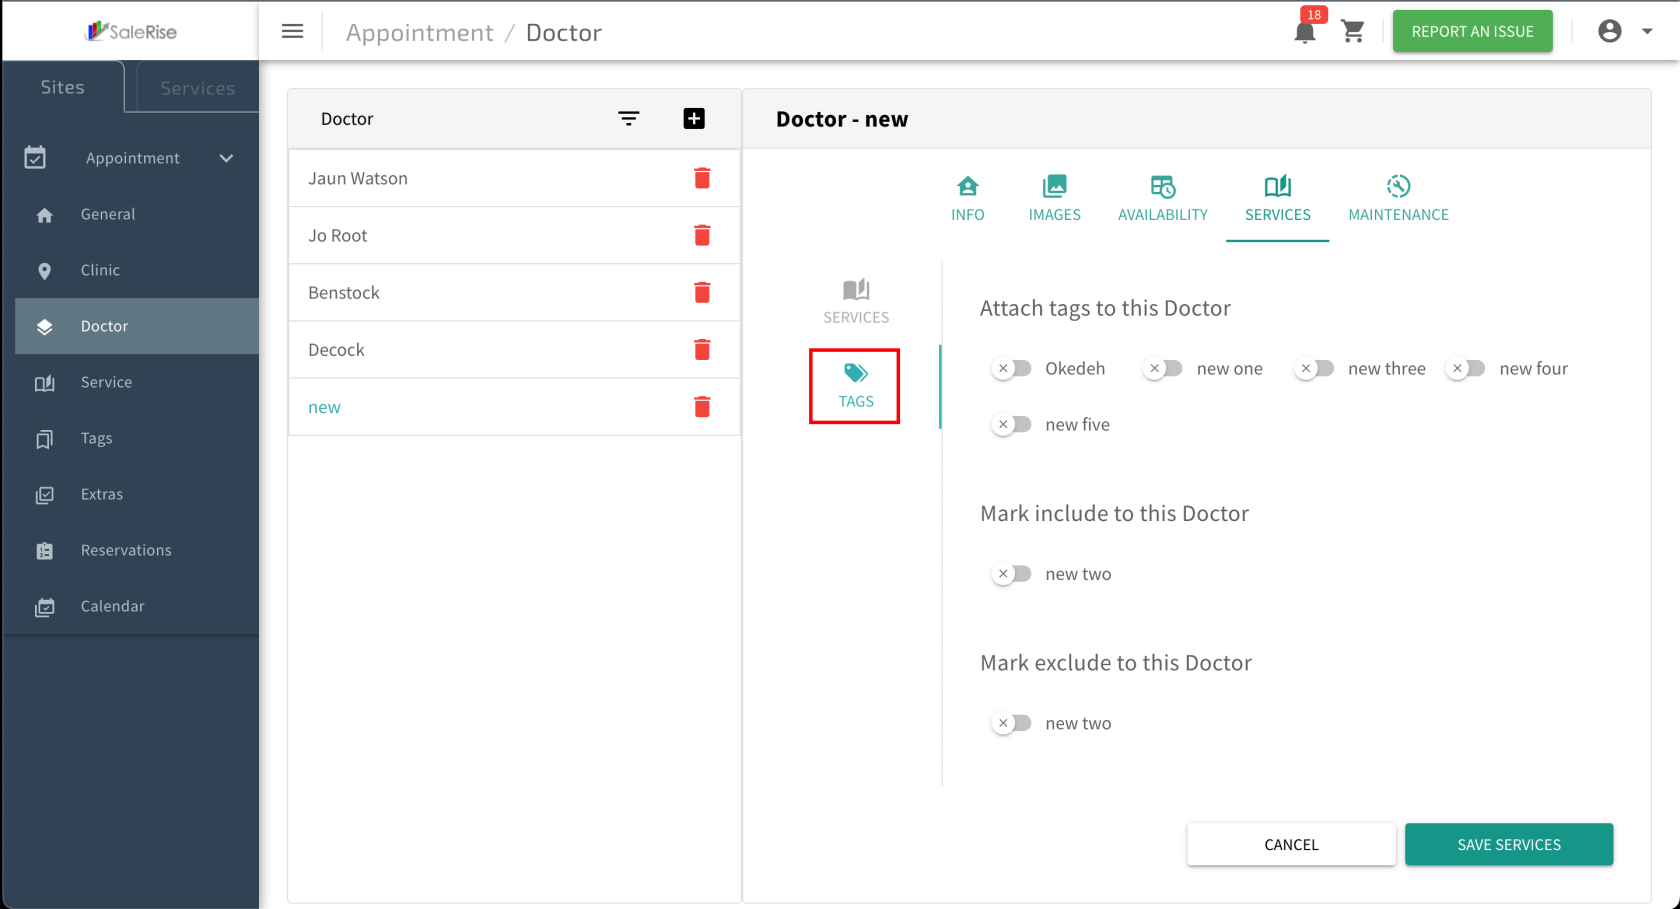
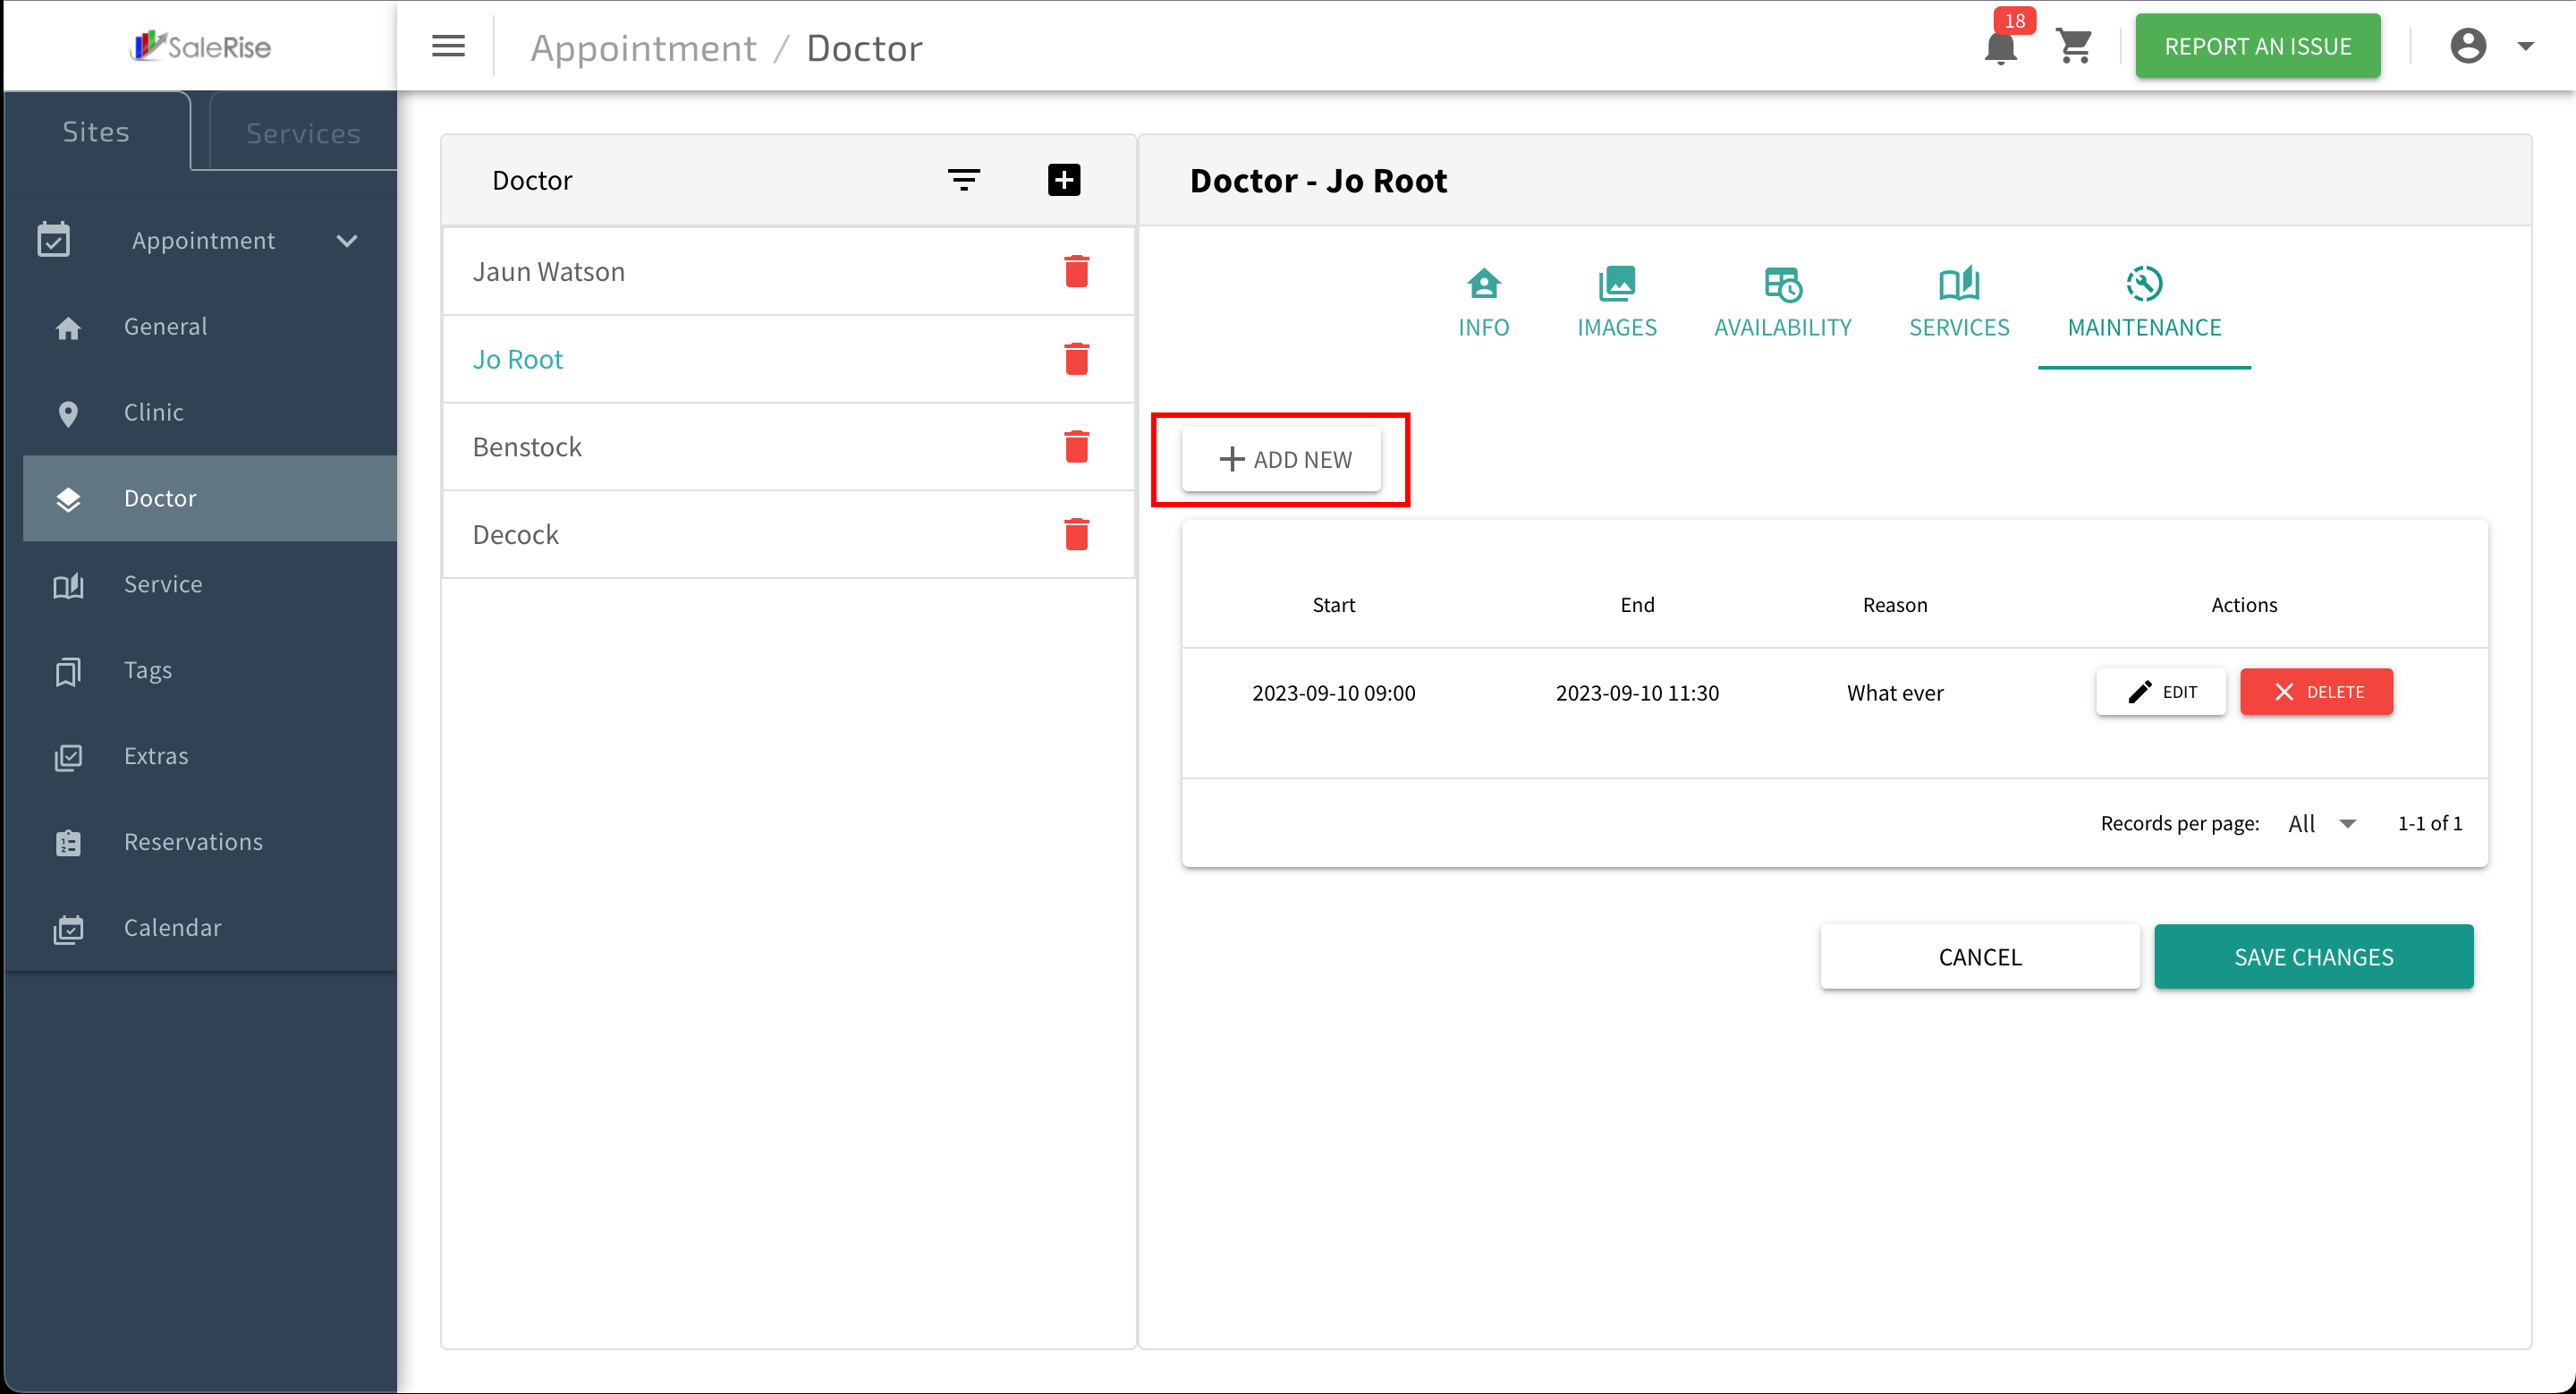
Maintenance Schedules:Access the "Maintenance" tab to manage technician unavailability.Add New Maintenance:Specify start and end dates, times, and reasons.
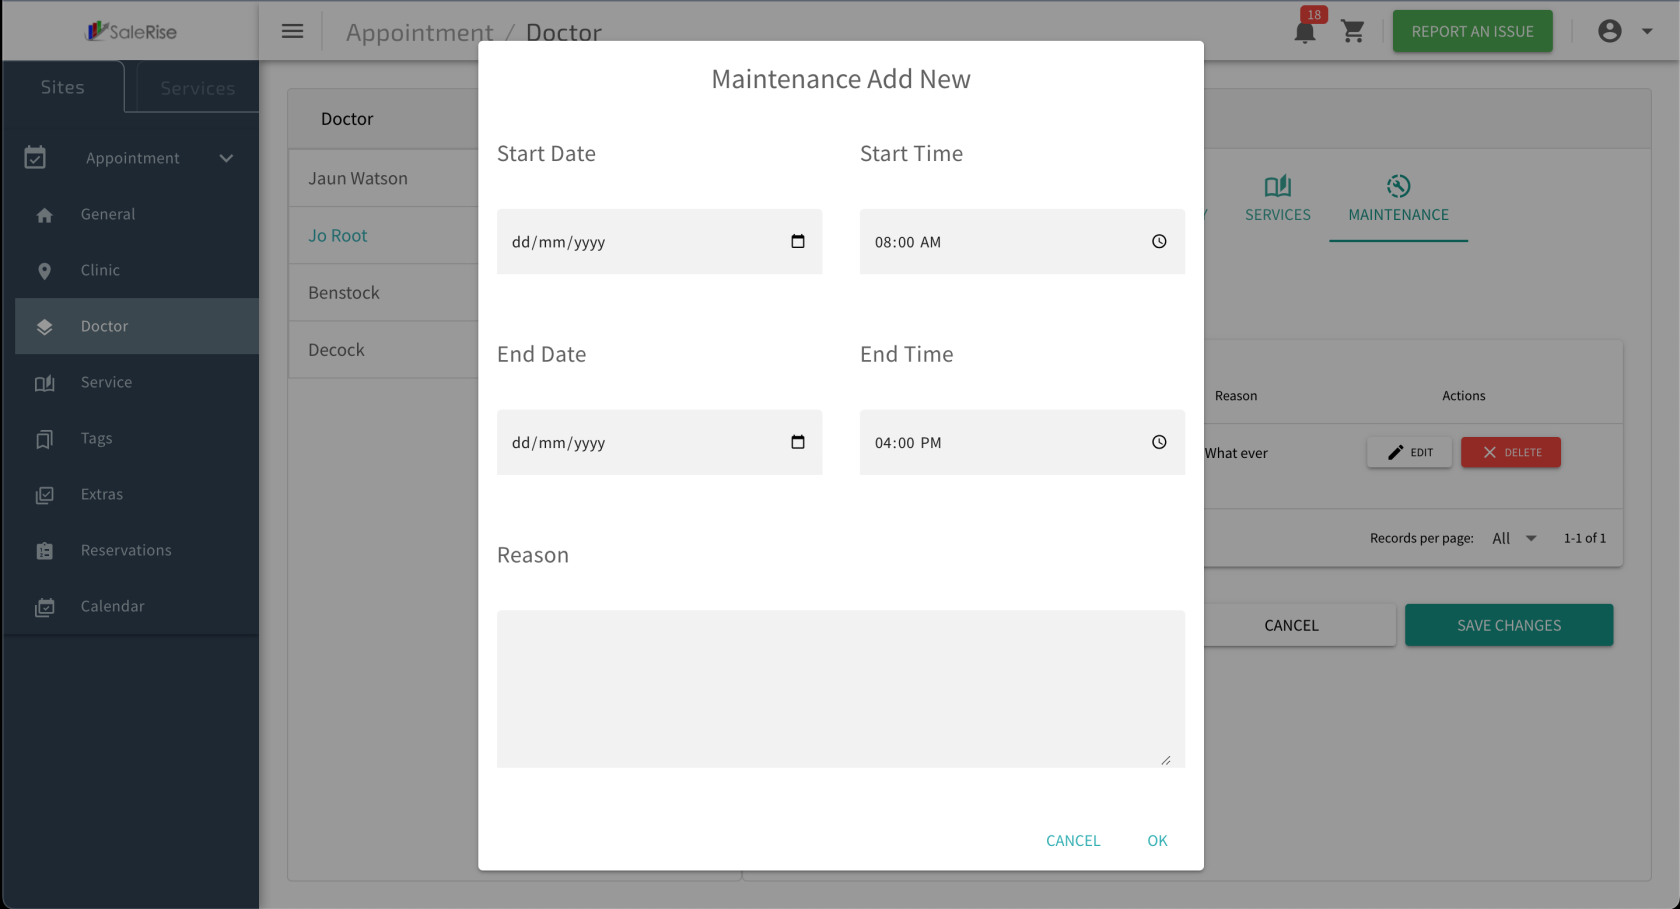
Table View:Display a table view of past and upcoming maintenance schedules.- Edit
orExistingDelete Maintenance:Allow users to modify or remove maintenance entries.
Save and Review:Click "Save" to confirm the technician setup.Review the technician profile and make any necessary edits.
View and Manage Technician:Rooms:- Access the list of
techniciansexisting rooms with options to edit ordeactivate.delete.
- Access the list of
-
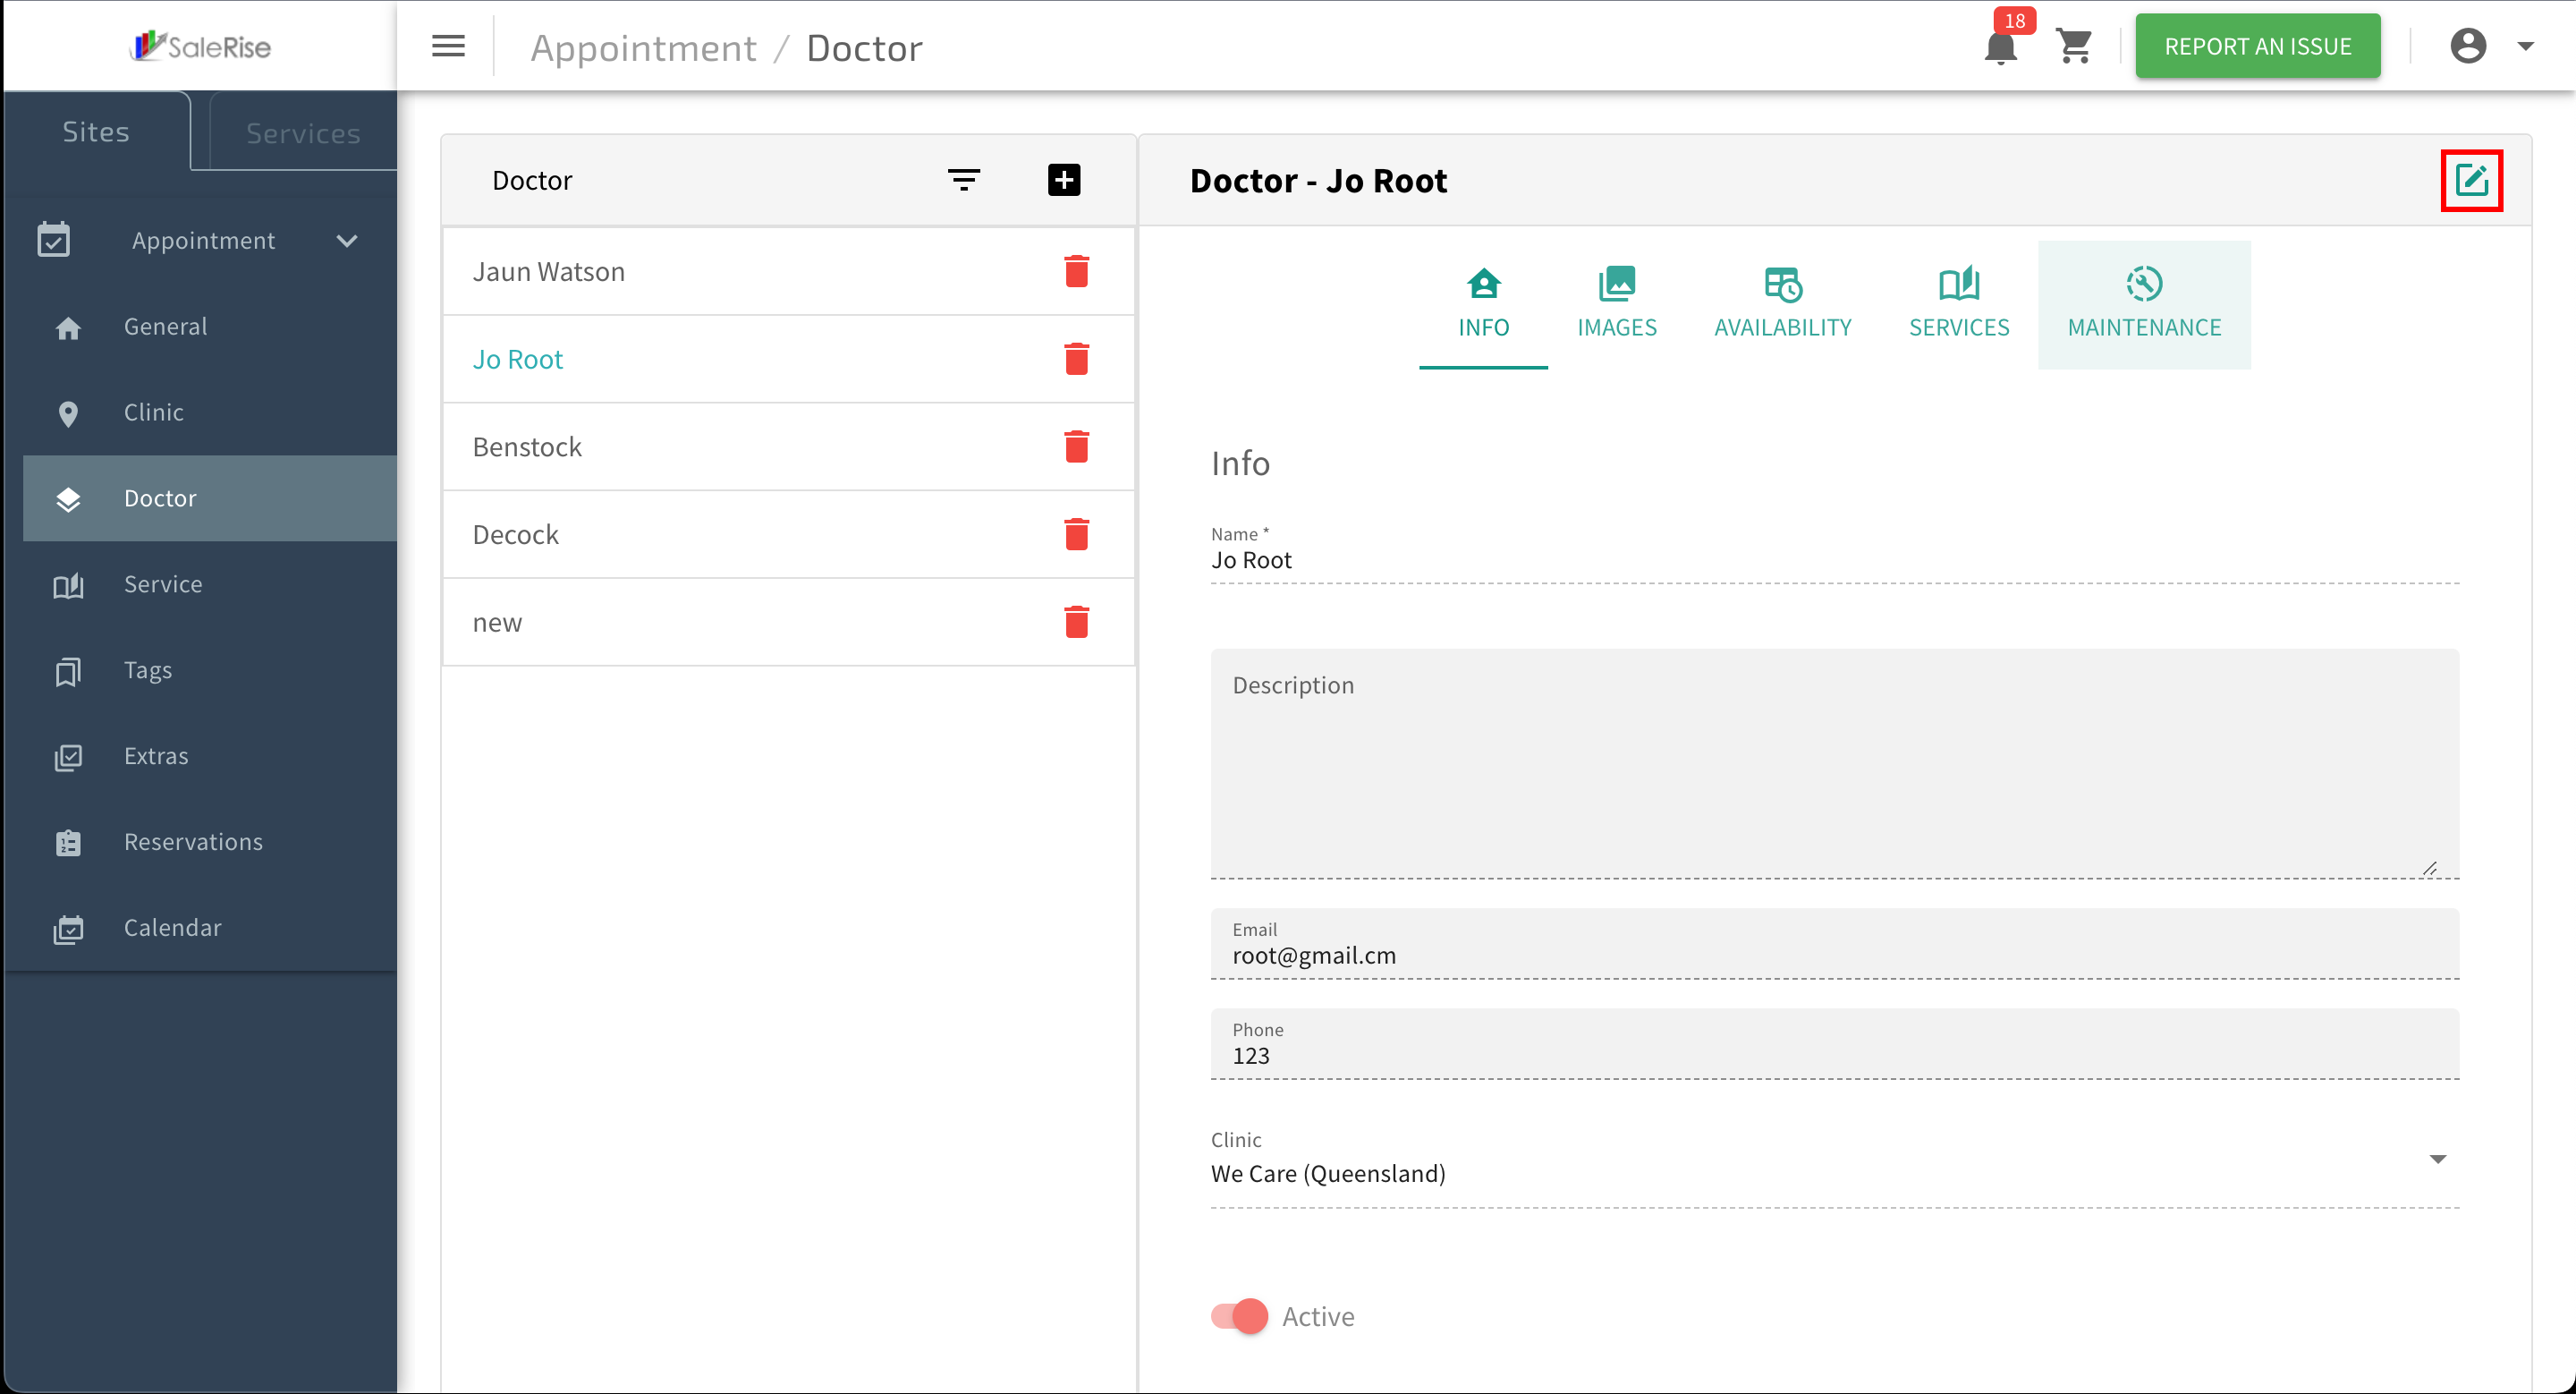
Edit
TechnicianRoom Details:- Click on the edit button to modify room information.
-
Delete Room:
- Remove a room if it is no longer needed.
-
Maintenance Management:
- In the
technician"Maintenance"information.
- Add Maintenance:
- Specify the start date, start time, end date, end time, and reason for unavailability.
- Click "Save" to confirm the maintenance schedule.
- View Maintenance Log:
- Access a table view of old and new maintenance schedules.
- Edit or delete existing maintenance entries as needed.
- Add Maintenance:
- In the